Gigneo provides a centralized settings panel where you can control how your marketplace operates. Properly configuring these options ensures your platform functions smoothly and provides the right experience for both service providers and clients.
To access all marketplace settings, navigate to Gigneo → Settings from your WordPress admin dashboard.
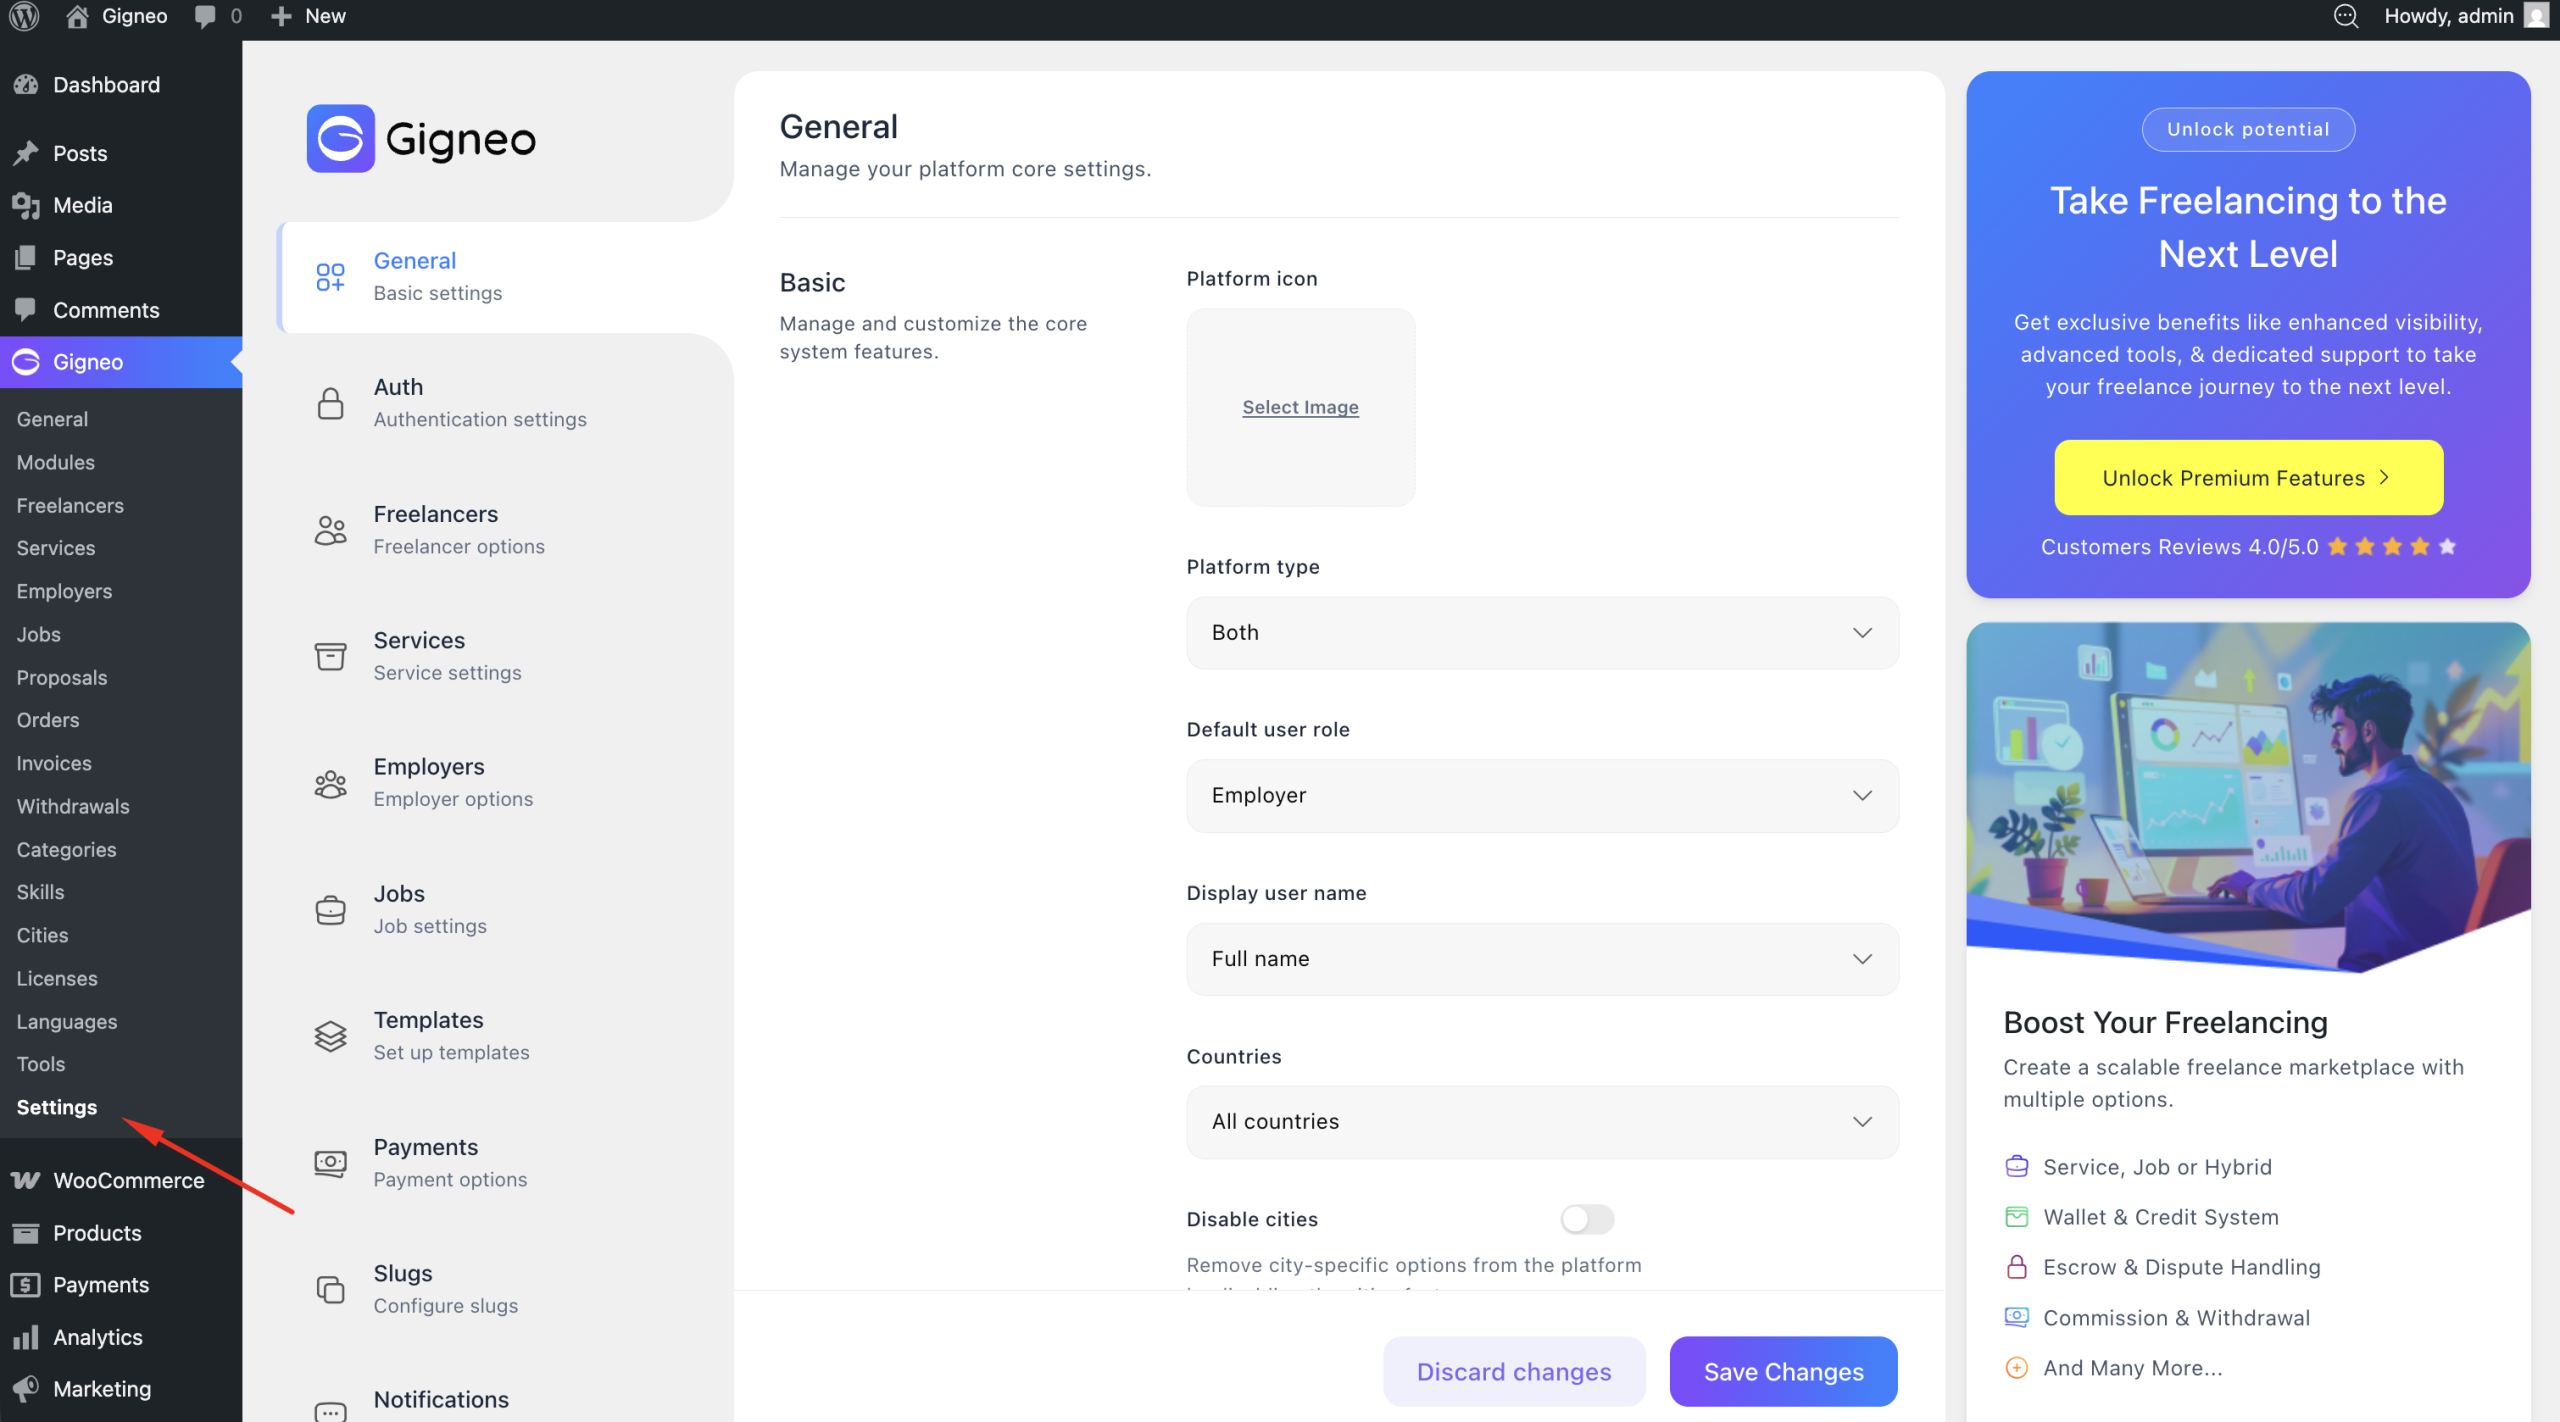
The first settings you should review are General Settings.
General Settings
The General Settings section allows you to configure the core structure and behavior of your marketplace.
To access these settings, navigate to Gigneo → Settings → General.
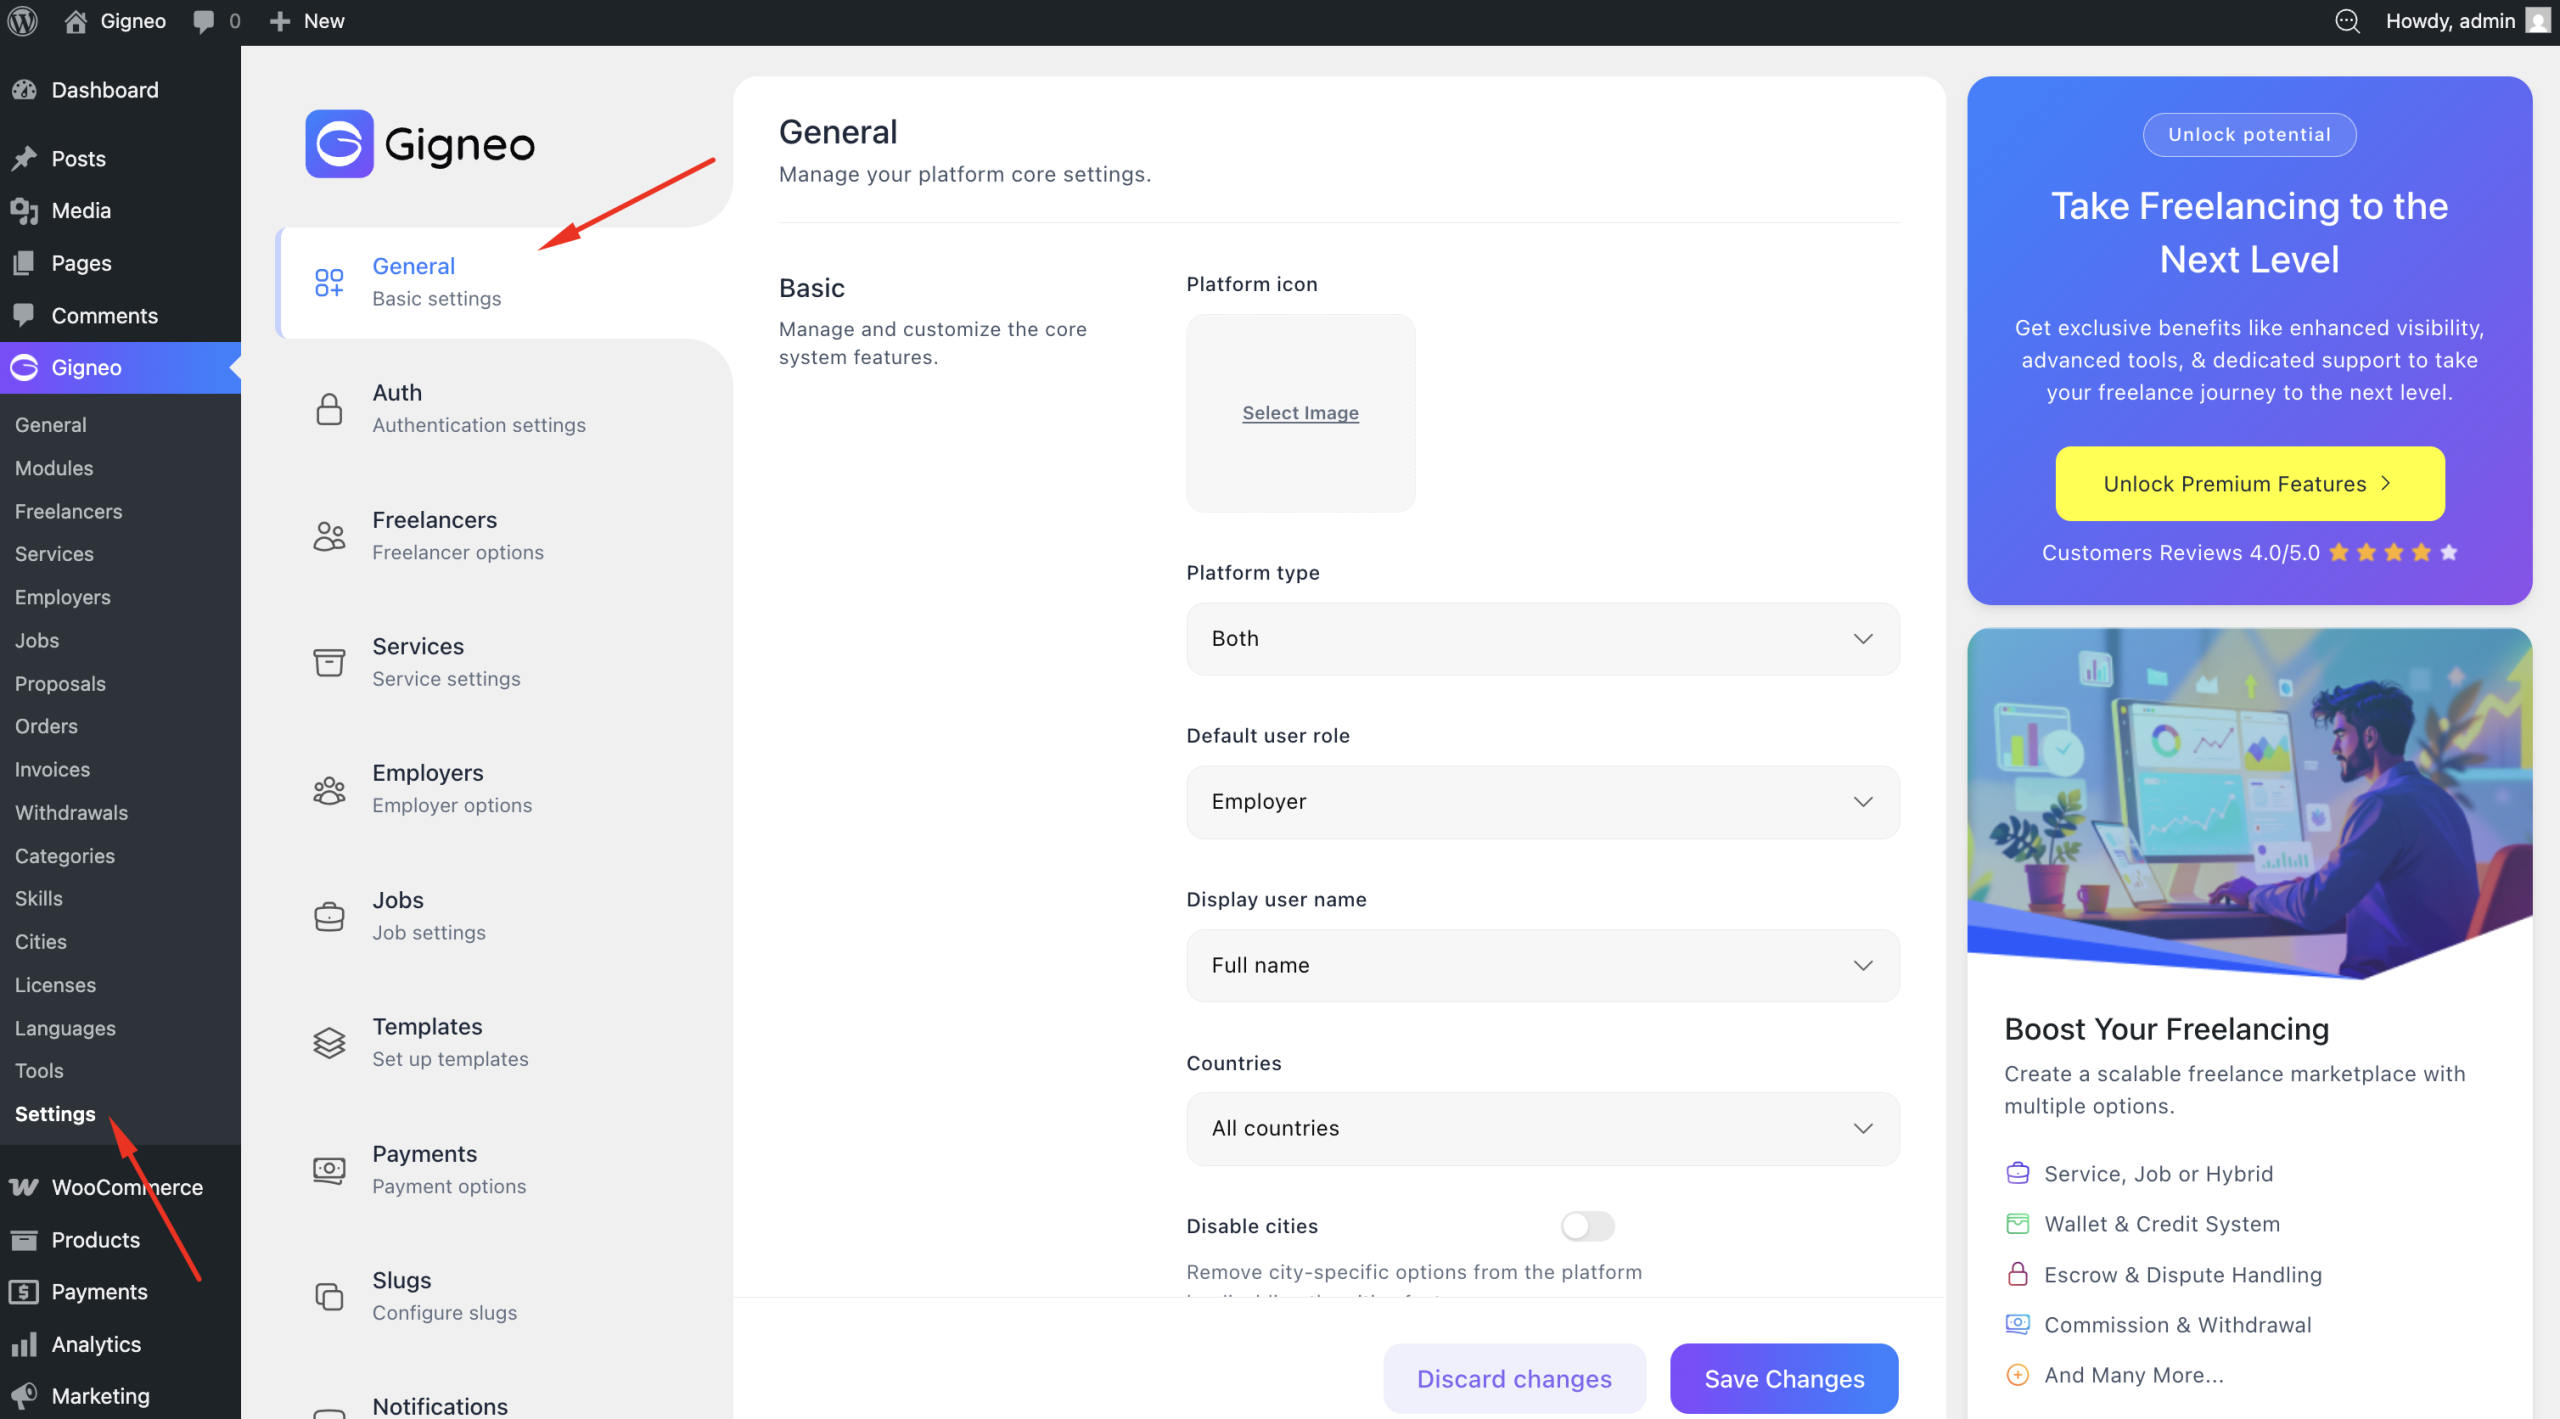
Here you can configure your platform type by choosing whether your marketplace will operate as a service-based platform, a job-based platform, or support both systems together.
You can also manage countries selection, allowing you to define the regions where your marketplace will be available. This helps you control access based on your target audience and business requirements.
The appearance settings allow you to customize how marketplace elements are displayed across your website, helping maintain consistency with your site design and branding.
You can also configure account settings, which control how user accounts function across your marketplace and manage account-related platform behavior for service providers and clients.
Auth Settings
The Auth Settings section allows you to configure how user authentication and registration work across your marketplace.
To access these settings, navigate to Gigneo → Settings → Auth.
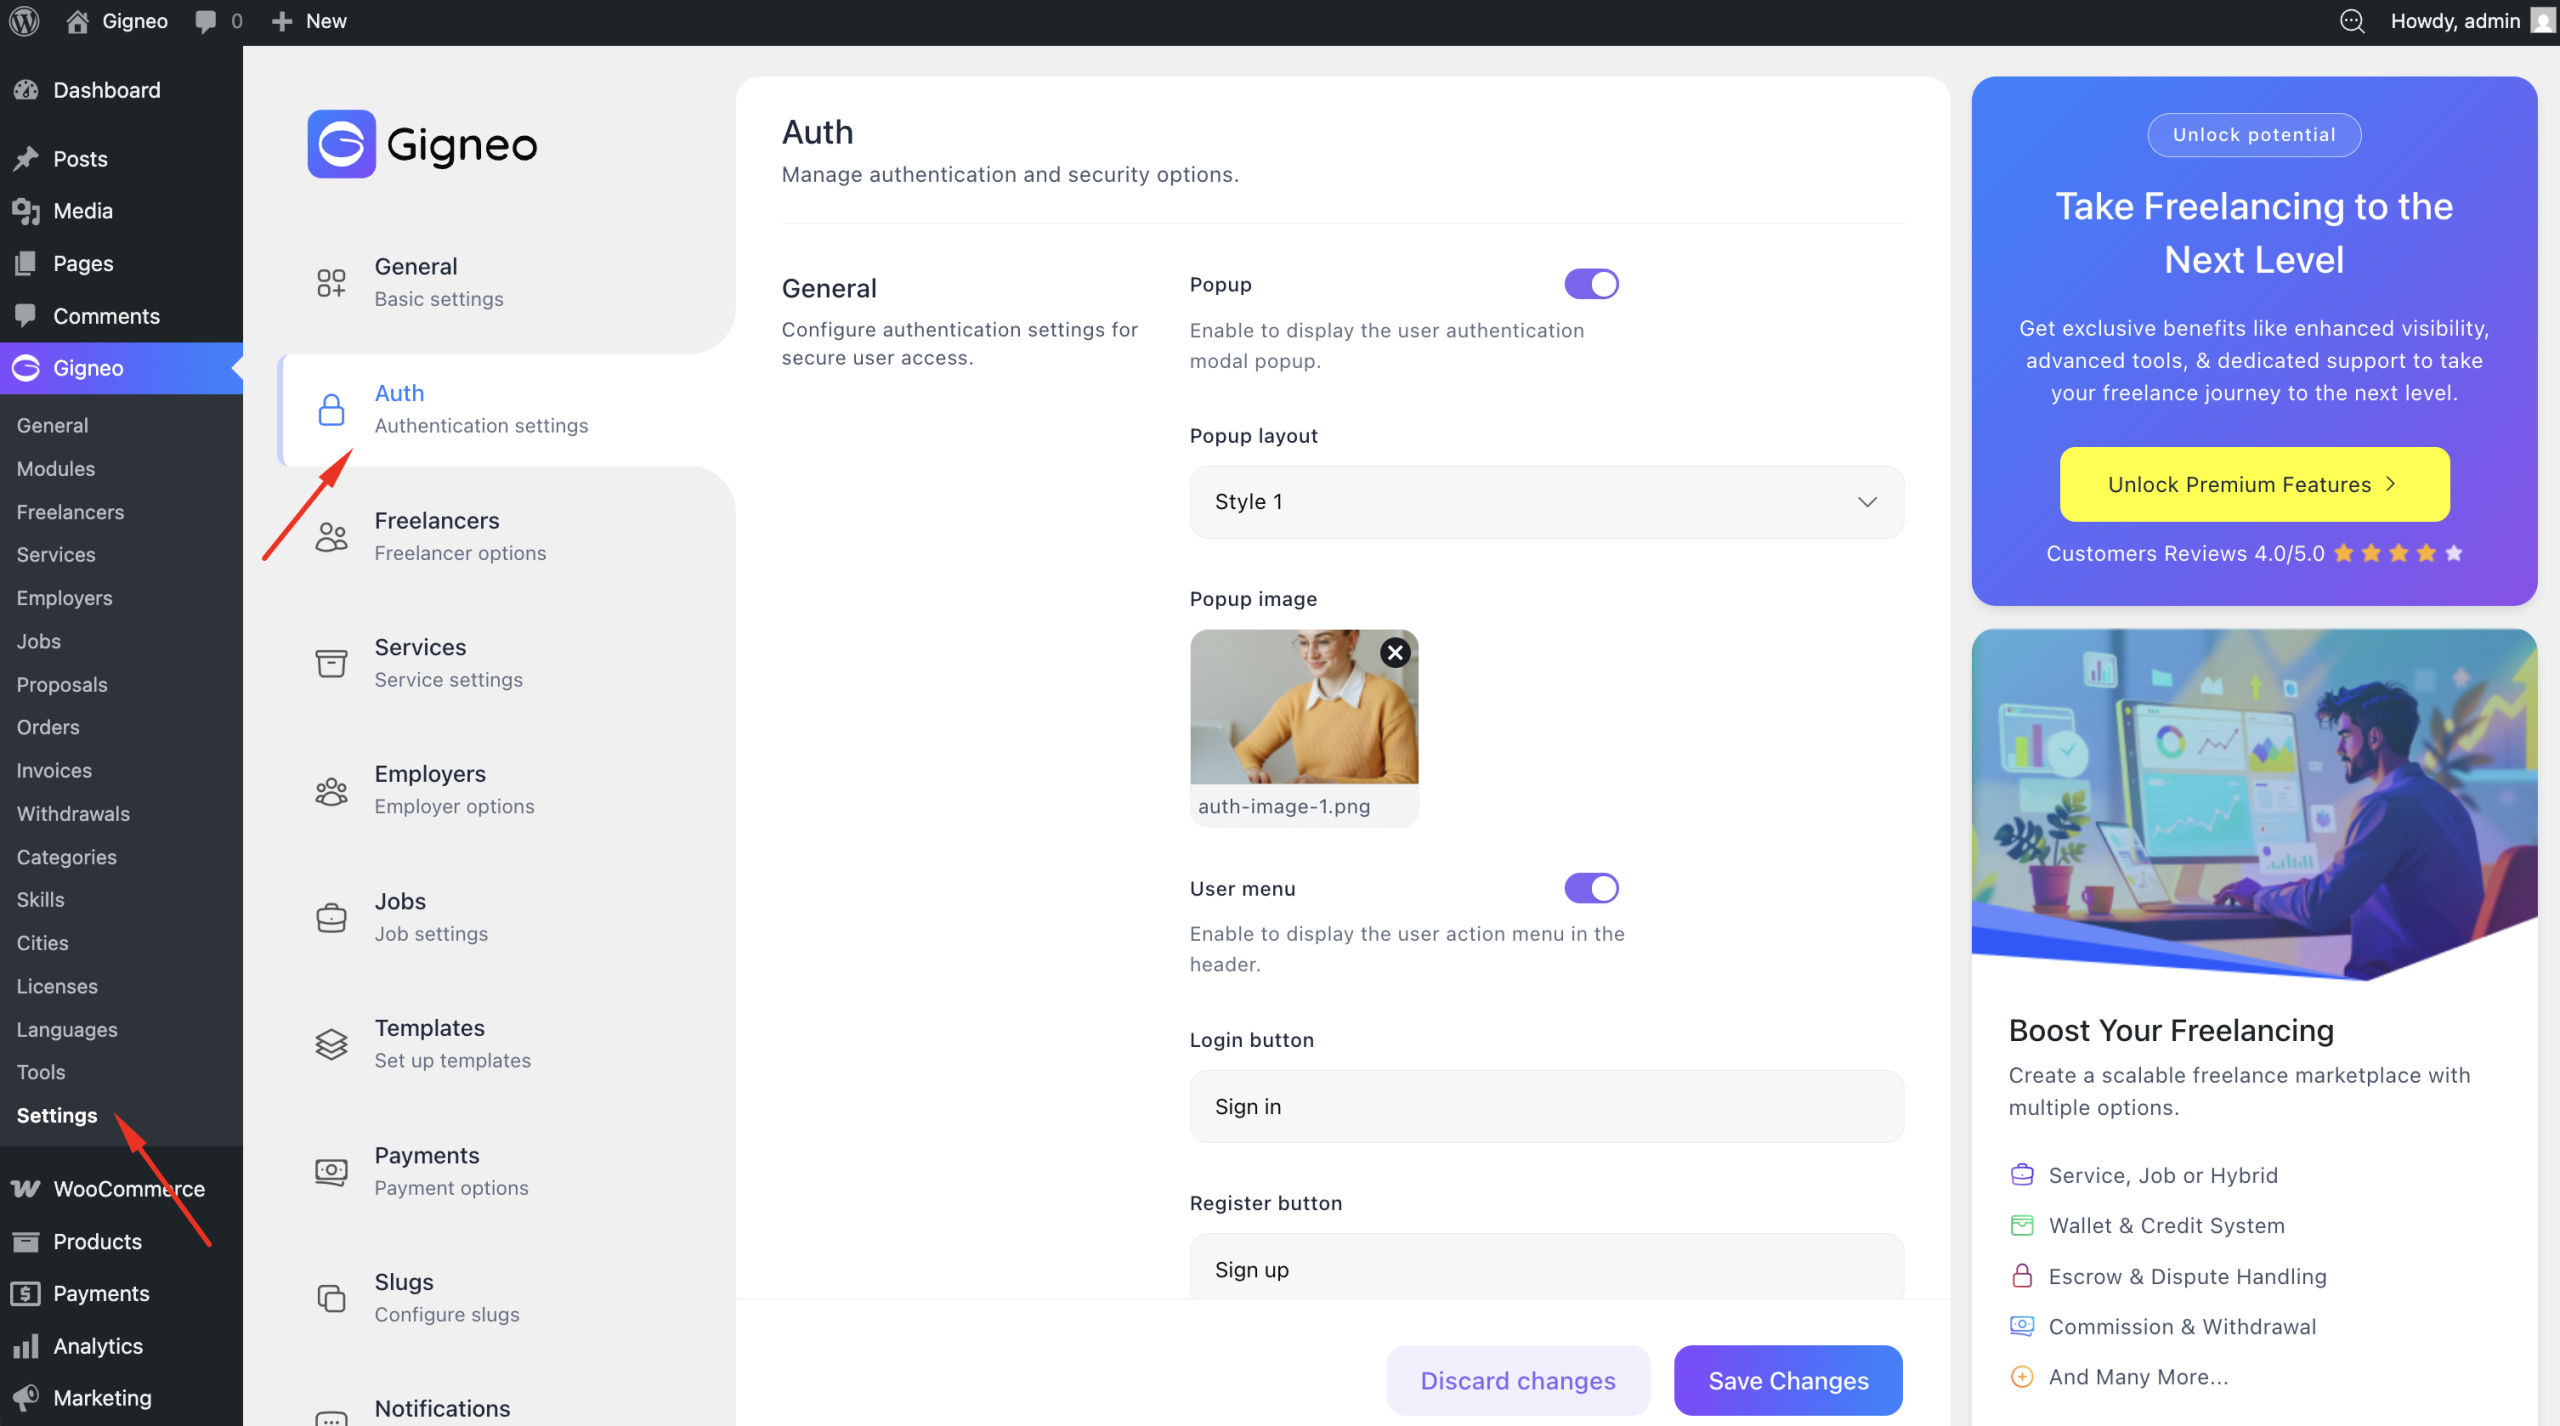
Here you can choose the authentication type for your platform by selecting whether login and registration will appear through a modal popup or dedicated authentication pages.
You can also enable or disable user registration depending on how you want users to access your marketplace. This gives you full control over whether new users can create accounts.
The registration role selection option allows users to choose their account type during signup. This helps users register directly as the appropriate marketplace role based on your platform structure.
You can also configure password strength requirements to control account security during registration. This helps ensure users create stronger passwords and improves overall marketplace security.
Freelancer Settings
The Freelancer Settings section allows you to configure all marketplace settings related to service providers.
To access these settings, navigate to Gigneo → Settings → Freelancers
Settings.

Here you can customize the singular and plural naming used for service provider roles across your marketplace. This allows you to replace default role labels with terminology that better matches your marketplace niche.
For example, depending on your platform type, you can rename providers to match your industry-specific branding and create a more tailored marketplace experience.
You can also configure archive settings, which control how provider listings are displayed on archive pages throughout your marketplace.
In addition, this section includes other provider-related configuration options that help define how service providers interact with the platform, manage profiles, and appear across marketplace listings.
These settings are important for aligning the provider experience with your marketplace structure and branding.
Service Settings
The Service Settings section allows you to configure how service-based functionality operates across your marketplace.
To access these settings, navigate to Gigneo → Settings → Services.

Here you can configure the service type for your platform by choosing whether services will support remote, onsite, or both delivery options. This allows you to define how services are offered across your marketplace.
You can also set the featured service limit, which controls how many featured services users can create on the platform.
The service approval settings allow you to choose whether newly submitted services require manual admin approval before publishing or are approved automatically.
Gigneo also allows you to configure service creation conditions, including whether service creation is free or paid, along with any creation limits applied to users.
The commission options allow you to define how marketplace commissions are applied to service transactions, helping you manage platform monetization.
You can also configure service order options, which control how service transactions and order workflows are handled across your marketplace.
These settings give you complete control over how services are created, managed, approved, and transacted throughout your platform.
Employer Settings
The Employer Settings section allows you to configure all marketplace settings related to employers or clients on your platform.
To access these settings, navigate to Gigneo → Settings → Employers.
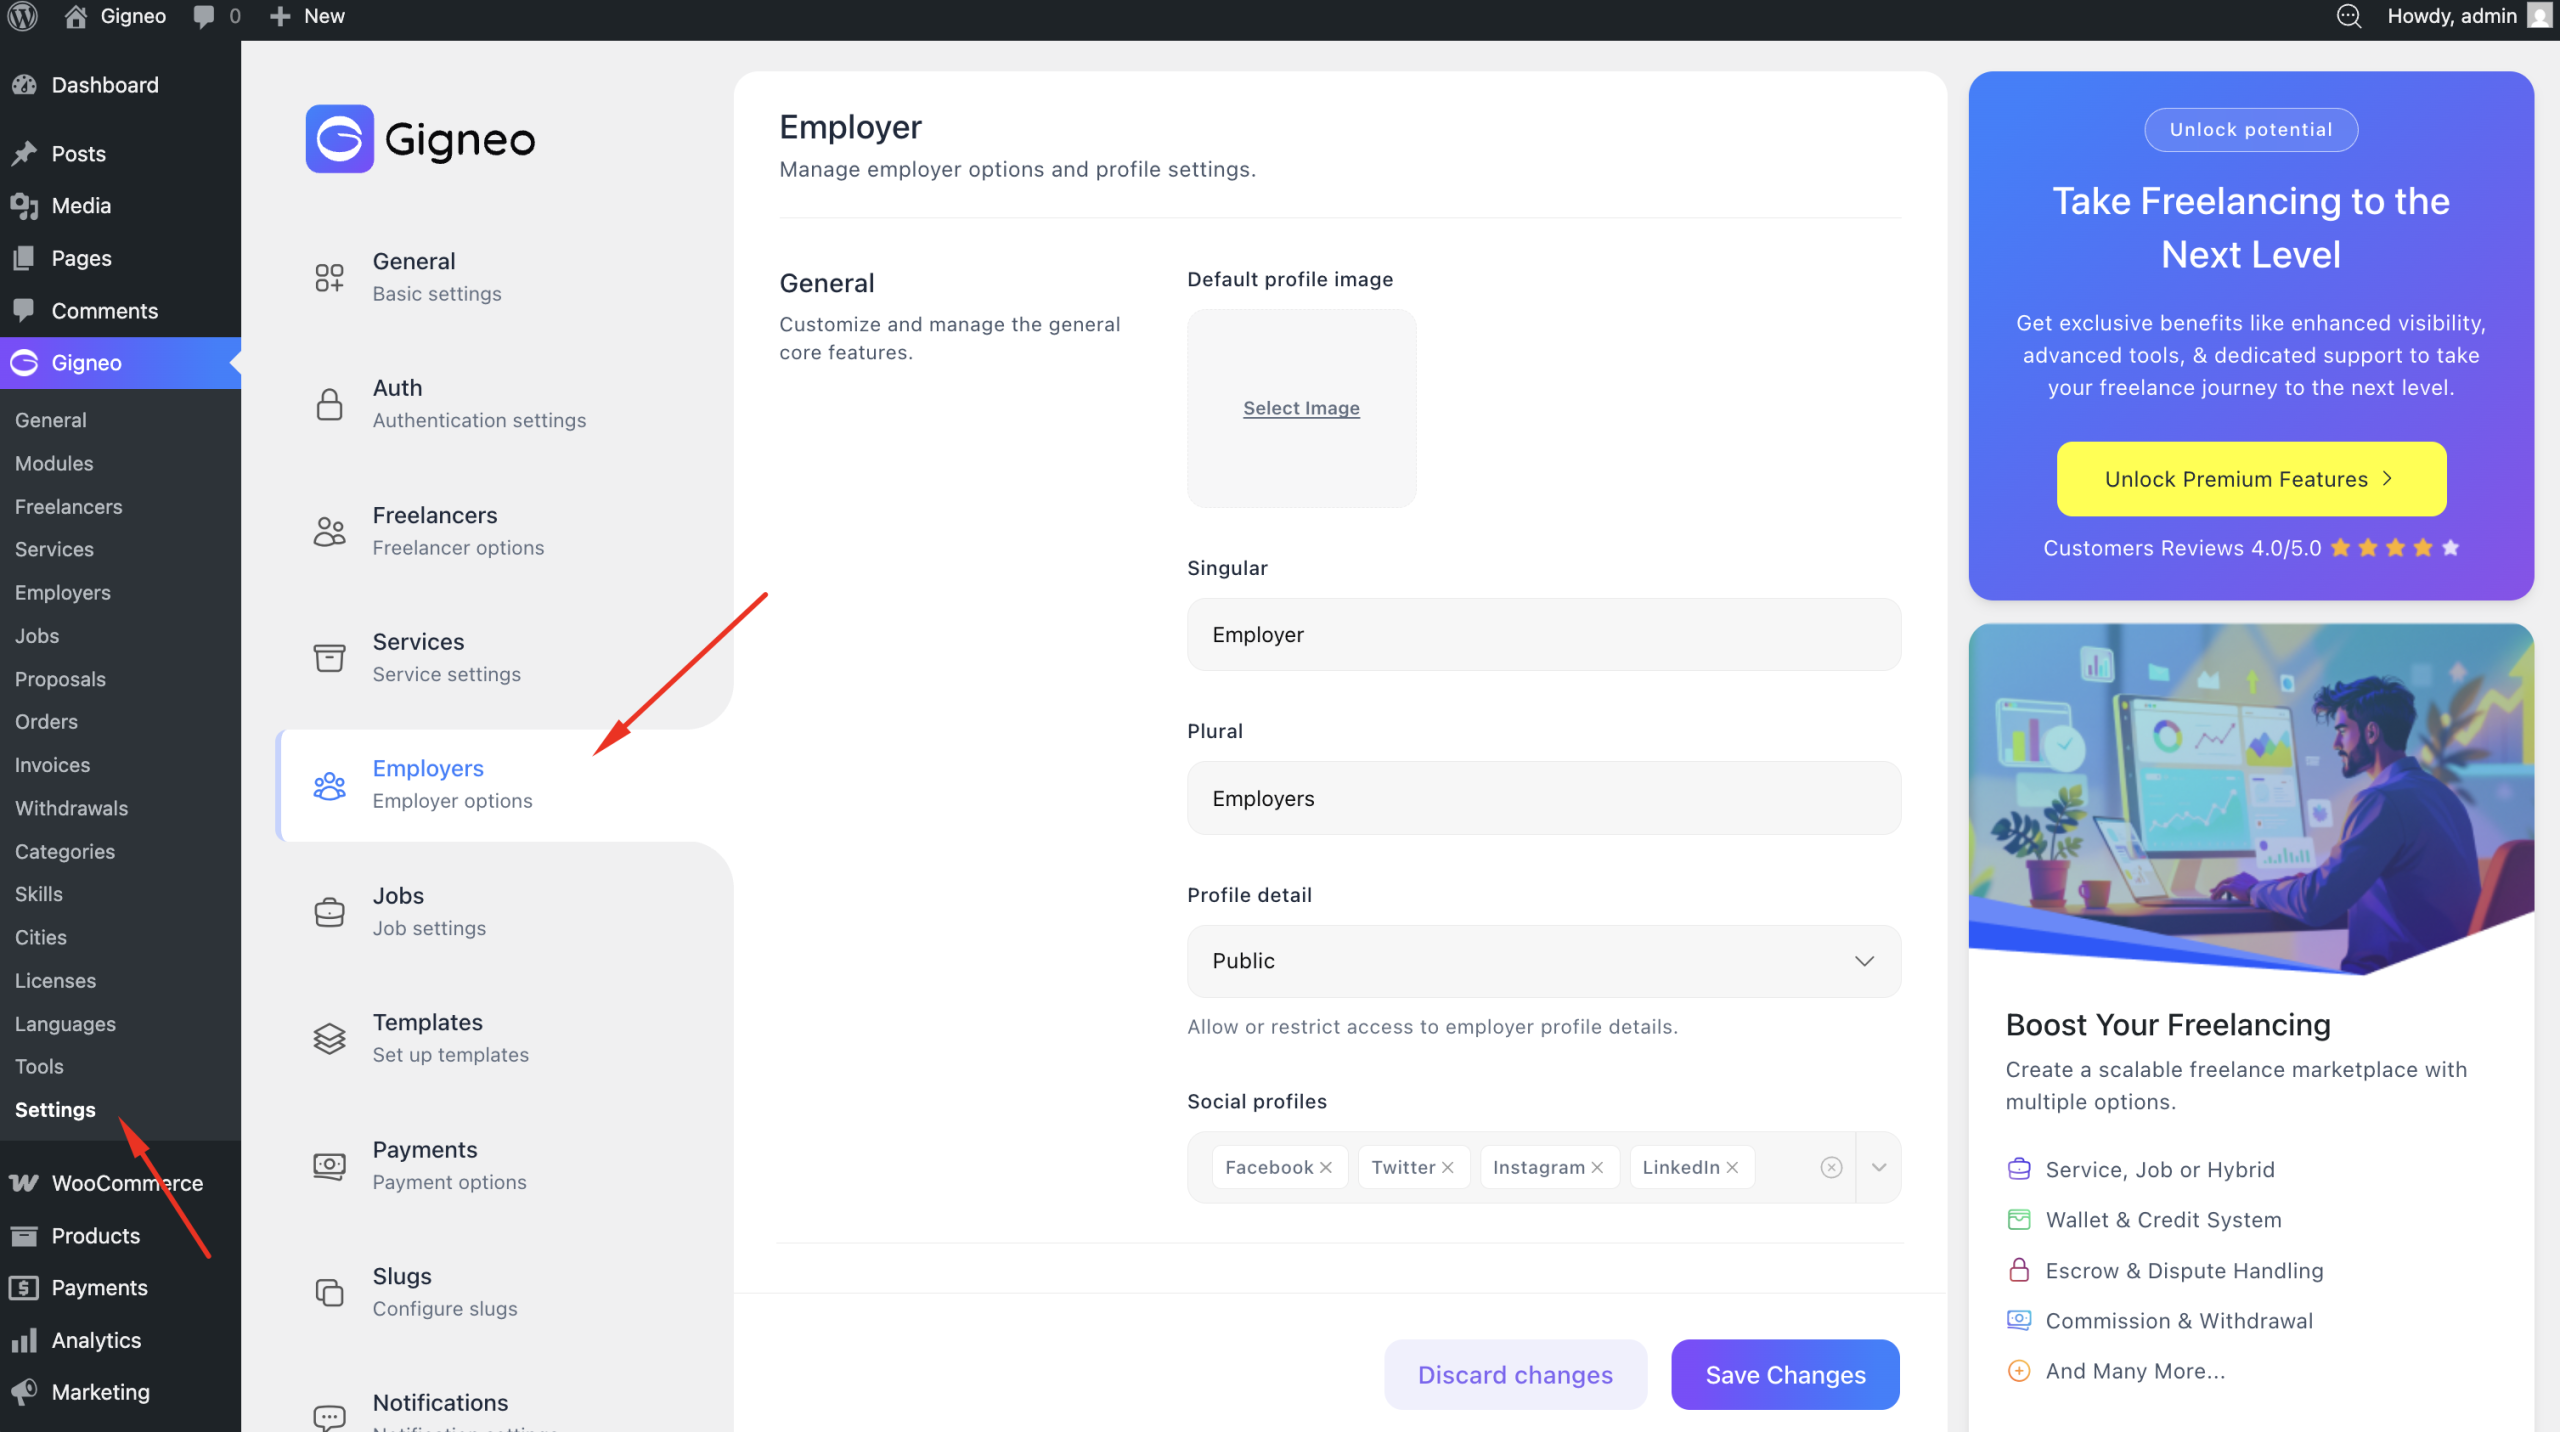
Here you can customize the singular and plural naming used for employer roles across your marketplace. This allows you to replace default role labels with terminology that better fits your marketplace niche and business model.
For example, you can rename employers based on your platform type to create a more customized and industry-specific user experience.
You can also configure archive settings, which control how employer listings are displayed across archive pages within your marketplace.
In addition, this section includes other employer-related configuration options that help define how employers interact with the platform, manage profiles, and appear throughout marketplace listings.
These settings help ensure the employer experience is properly aligned with your marketplace structure and branding.
Job Settings
The Job Settings section allows you to configure how job-based functionality operates across your marketplace.
To access these settings, navigate to Gigneo → Settings → Jobs.
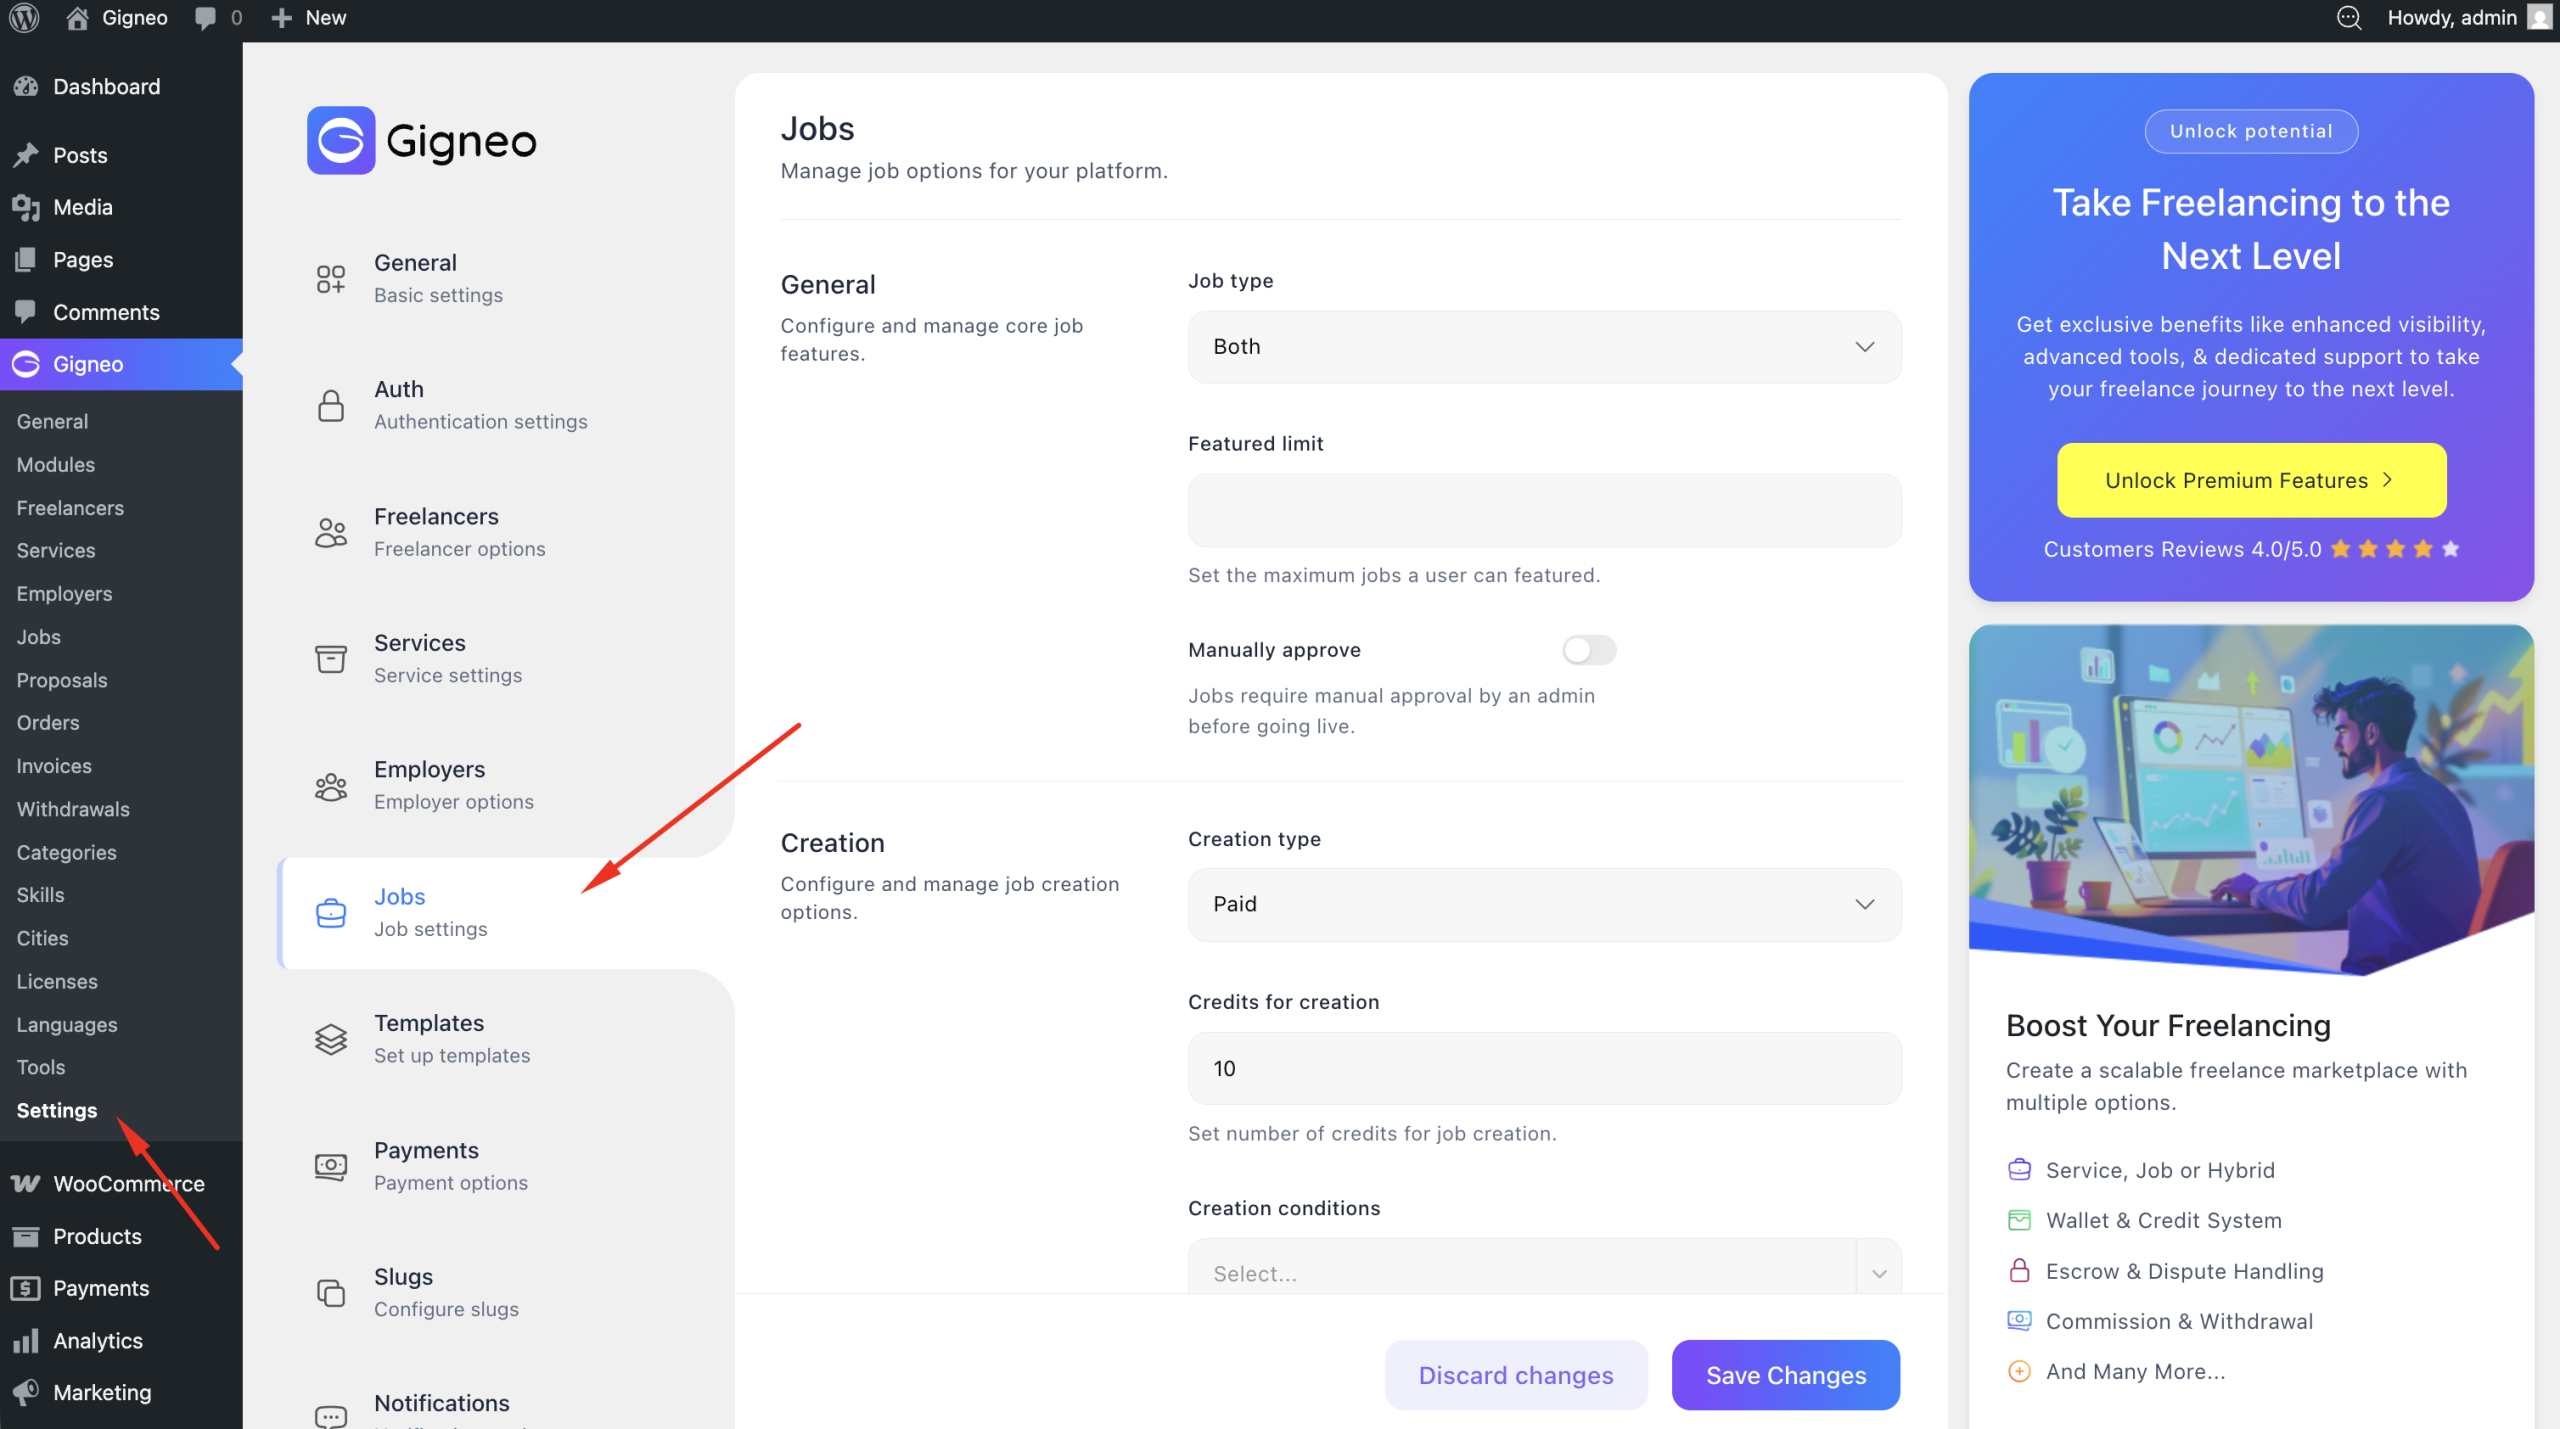
Here you can configure the job type for your platform by choosing whether jobs will support remote, onsite, or both service delivery options. This allows you to align your marketplace with your business model and target audience.
You can also define the featured job limit, which controls how many featured jobs users can create on the platform.
The job approval settings allow you to choose whether newly submitted jobs require manual admin approval before publishing or are approved automatically.
Gigneo also allows you to configure job creation conditions, including whether job posting is free or paid, along with any posting limits you want to apply to users.
The commission options allow you to define how marketplace commissions are applied to job-related transactions, helping you establish your monetization structure.
You can also configure recruitment options, which control how users apply for jobs and how hiring workflows operate within the platform.
The job orders settings allow you to manage job transaction behavior and define how job-based order workflows are handled throughout your marketplace.
These settings help you fully customize the job marketplace experience and ensure it operates according to your platform requirements.
Template Settings
The Template Settings section allows you to manage and assign all essential pages used across your marketplace.
To access these settings, navigate to Gigneo → Settings → Templates.
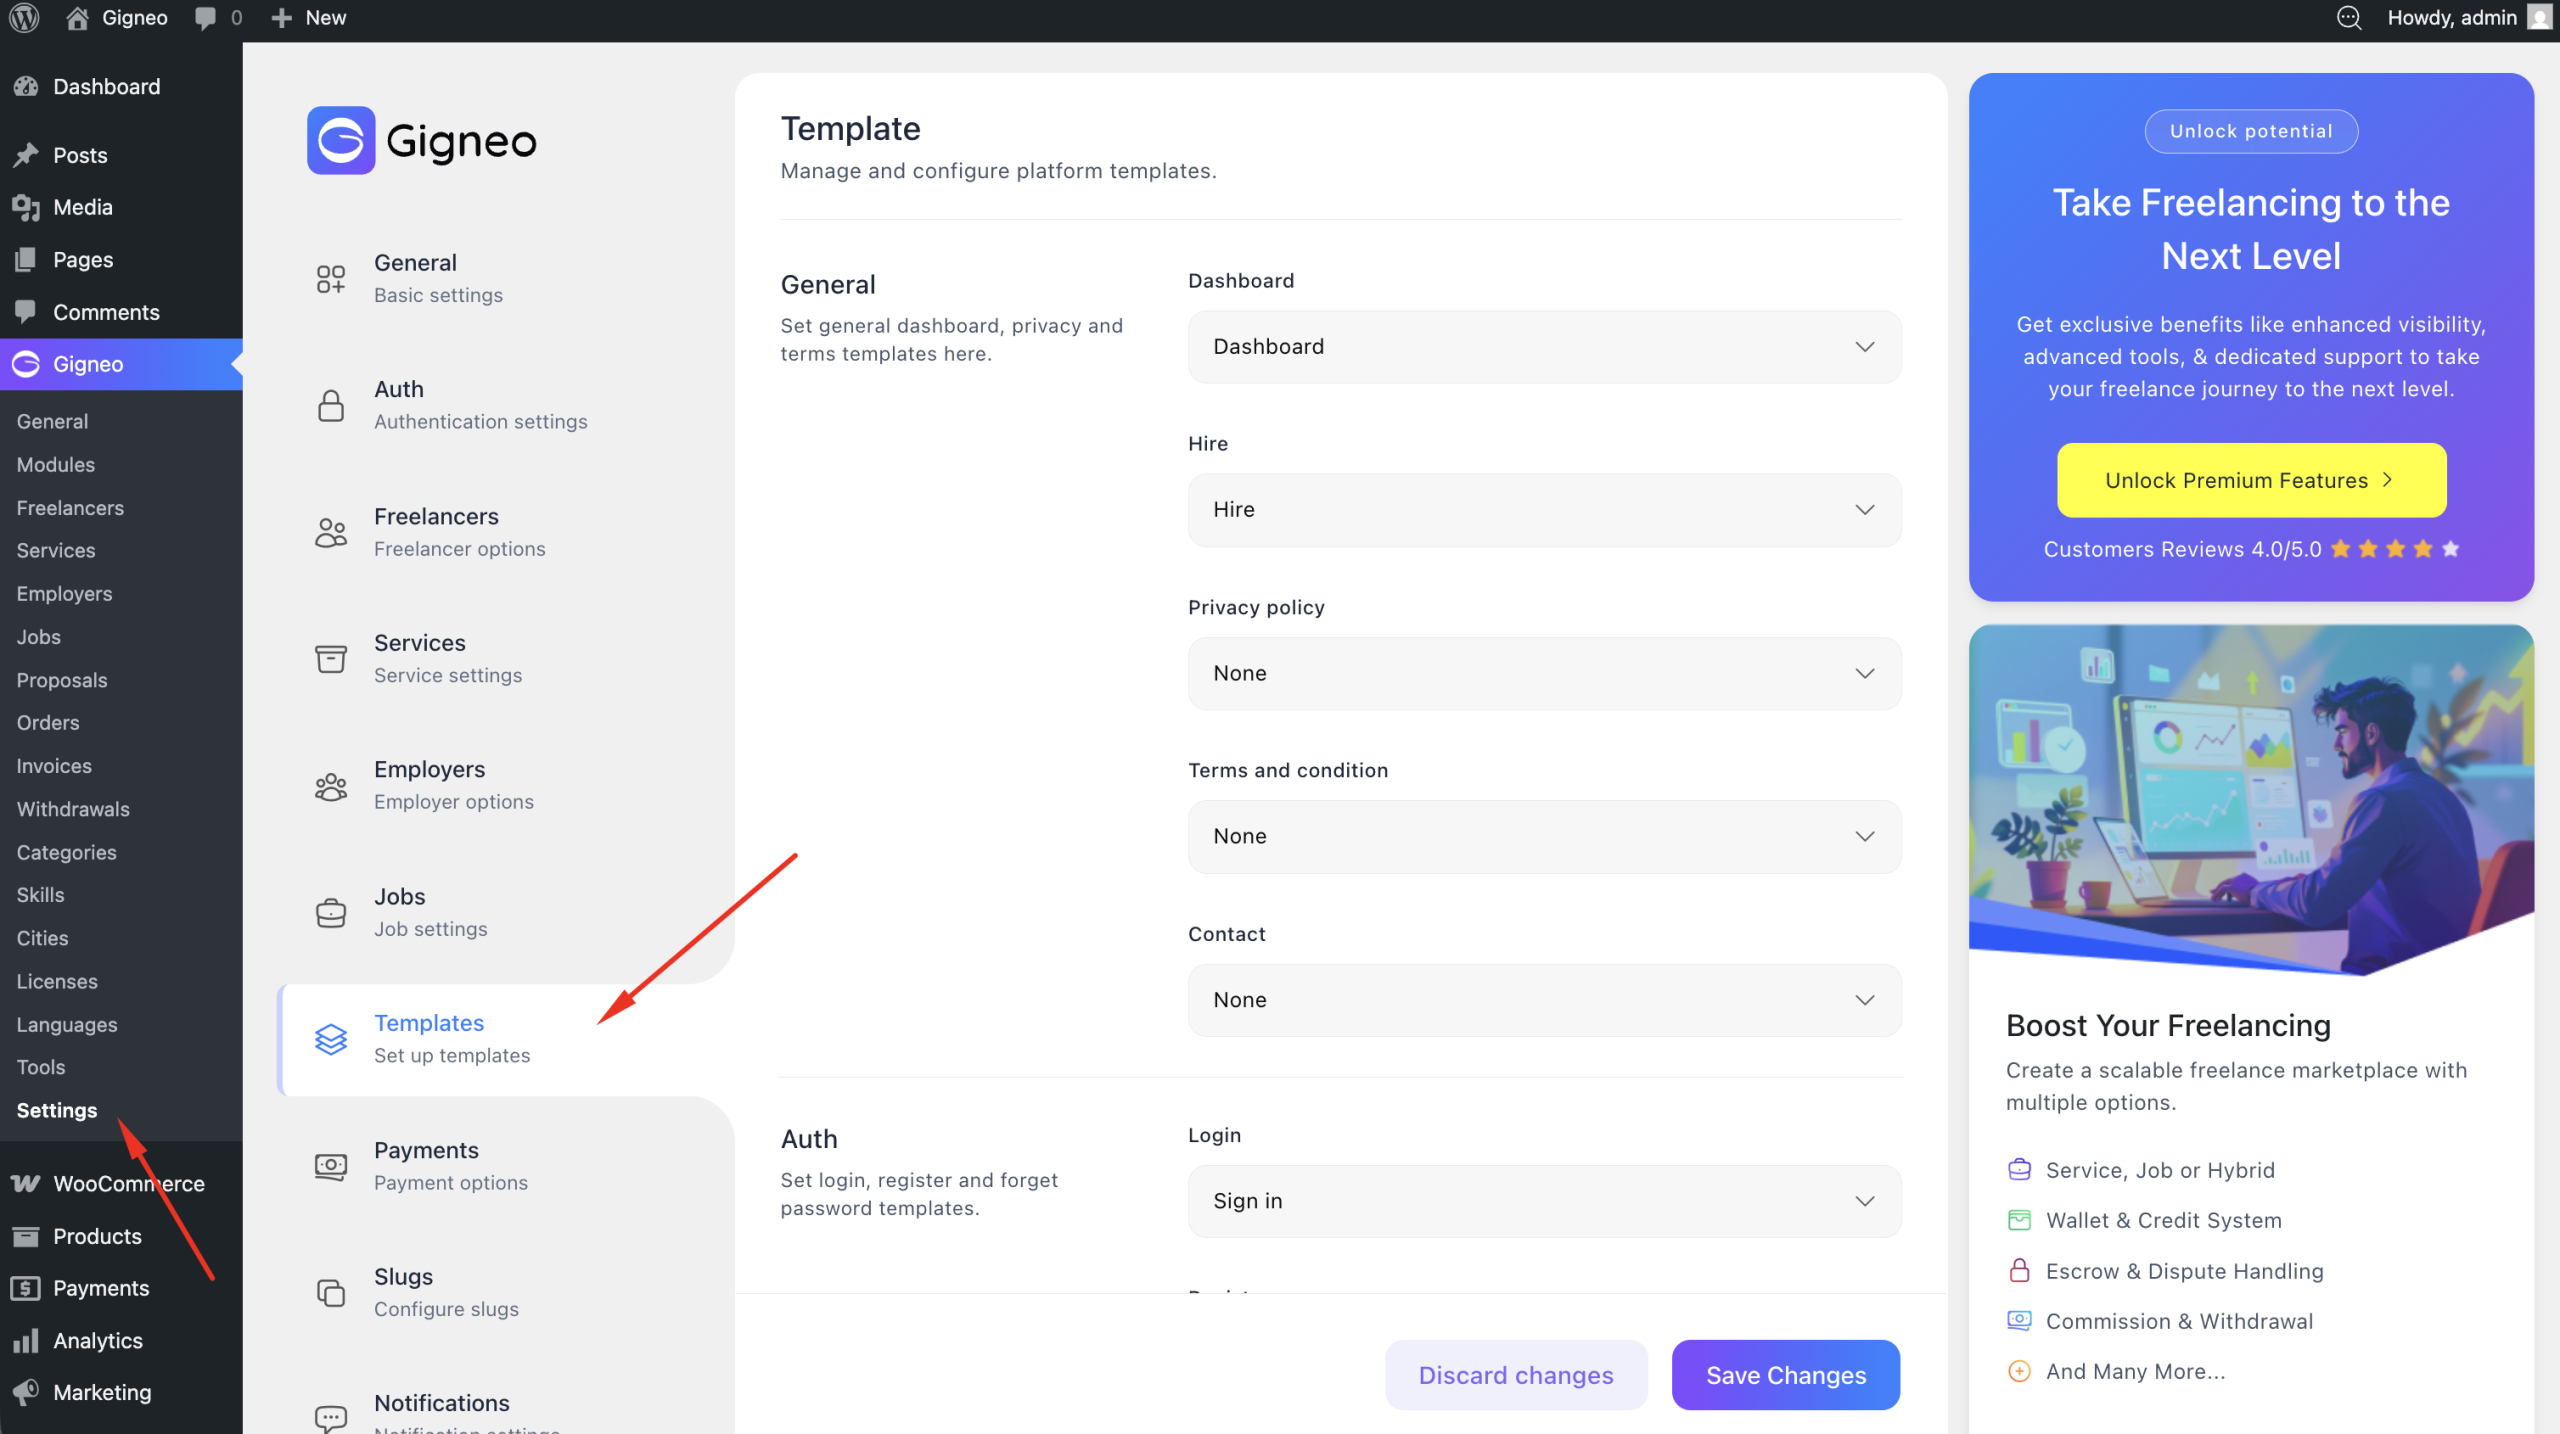
This section controls the page assignments required for different marketplace areas and ensures all platform templates are properly connected.
The General Templates allow you to assign important platform pages such as the Dashboard, Hire, Privacy Policy, Terms & Conditions, and Contact pages. These pages provide the core structure required for marketplace operations and user interaction.
The Auth Templates allow you to assign pages related to user authentication, including Login, Register, and Forgot Password pages. These templates control the account access flow across your marketplace.
The Archive Templates allow you to assign listing pages for key marketplace content, including Freelancers, Services, Employers, and Jobs archives. These pages display marketplace listings and help users browse platform content efficiently.
It is important to make sure all required templates are properly assigned to ensure smooth marketplace functionality and navigation across your website.
Payment Settings
The Payment Settings section allows you to configure the financial system of your marketplace and manage how transactions are handled across the platform.
To access these settings, navigate to Gigneo → Settings → Payments.

Here you can set up wallet and withdrawal products, which are used to manage all marketplace fund transactions separately from your regular WooCommerce store transactions.
By assigning dedicated wallet and withdrawal products, Gigneo is able to track all platform-related deposits, withdrawals, and financial activity independently. This ensures your standard WooCommerce product sales remain unaffected while marketplace transactions are managed in a separate system.
You can also configure the credit rate, which defines how platform credits or connects are valued and processed within your marketplace.
The withdrawal settings allow you to define payout behavior, including the minimum withdrawal amount users must reach before requesting a payout.
You can configure the withdrawal commission fee name, making it easier to label transaction deductions clearly for users.
Gigneo also allows you to set the withdrawal fee amount, which can be configured as either a fixed amount or a percentage-based fee depending on your marketplace monetization strategy.
In addition, the invoice settings allow you to configure invoice-related options used for marketplace transactions and payment records.
These settings help you create a structured and transparent financial system for your marketplace while maintaining complete control over wallet operations and payout management.
Slug Settings
The Slug Settings section allows you to customize the URL structure used across your marketplace.
To access these settings, navigate to Gigneo → Settings → Slugs.
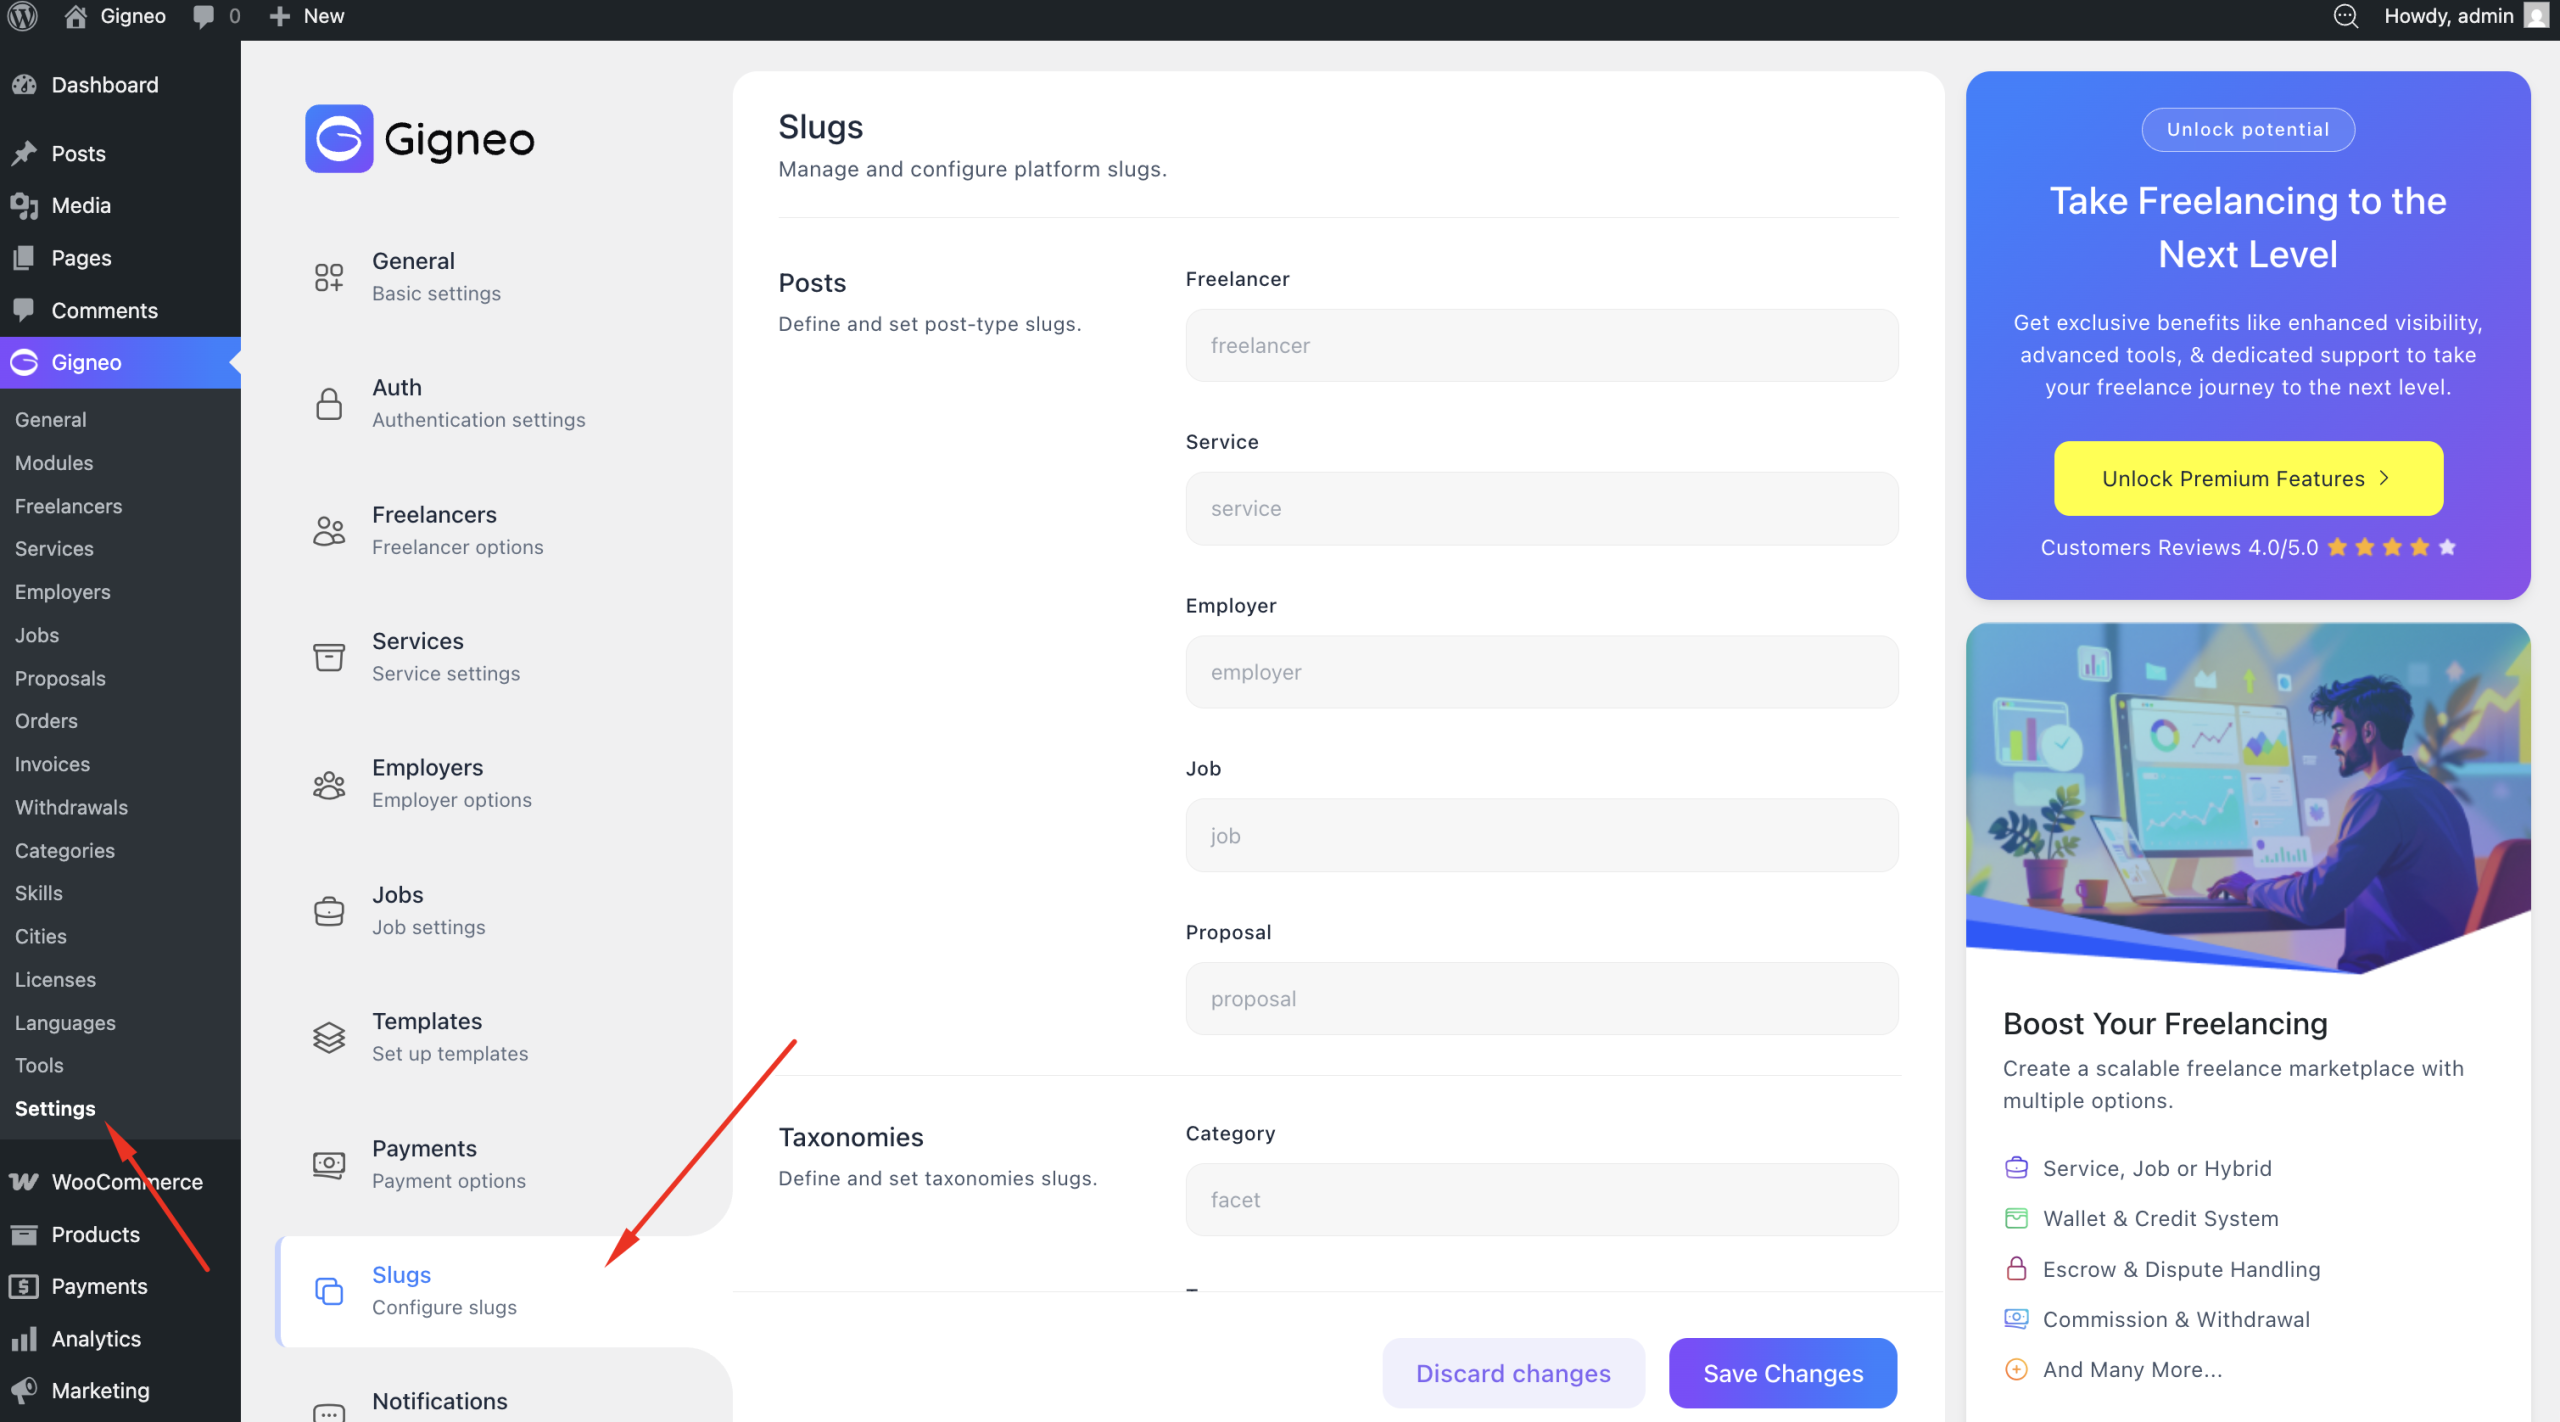
Here you can modify the slugs for marketplace post types, allowing you to create cleaner and more relevant URLs based on your platform niche and branding.
You can change the post slugs for Freelancers, Services, Employers, Jobs, and Proposals.
This allows you to replace default URL structures with custom naming that better matches your marketplace terminology.
For example, if your marketplace uses custom role names or niche-specific labels, updating the slug structure helps maintain consistency across your website.
The Slug Settings section also allows you to customize taxonomy slugs for Categories and Skills.
Changing taxonomy slugs helps organize your marketplace content structure more effectively and improves URL readability.
After making changes to slug settings, it is recommended to refresh your WordPress permalink structure to ensure all updated URLs work correctly.
These settings help you create a more branded, organized, and SEO-friendly marketplace URL structure.
Notification Settings
The Notification Settings section allows you to control how notifications are delivered and displayed across your marketplace.
To access these settings, navigate to Gigneo → Settings → Notifications.
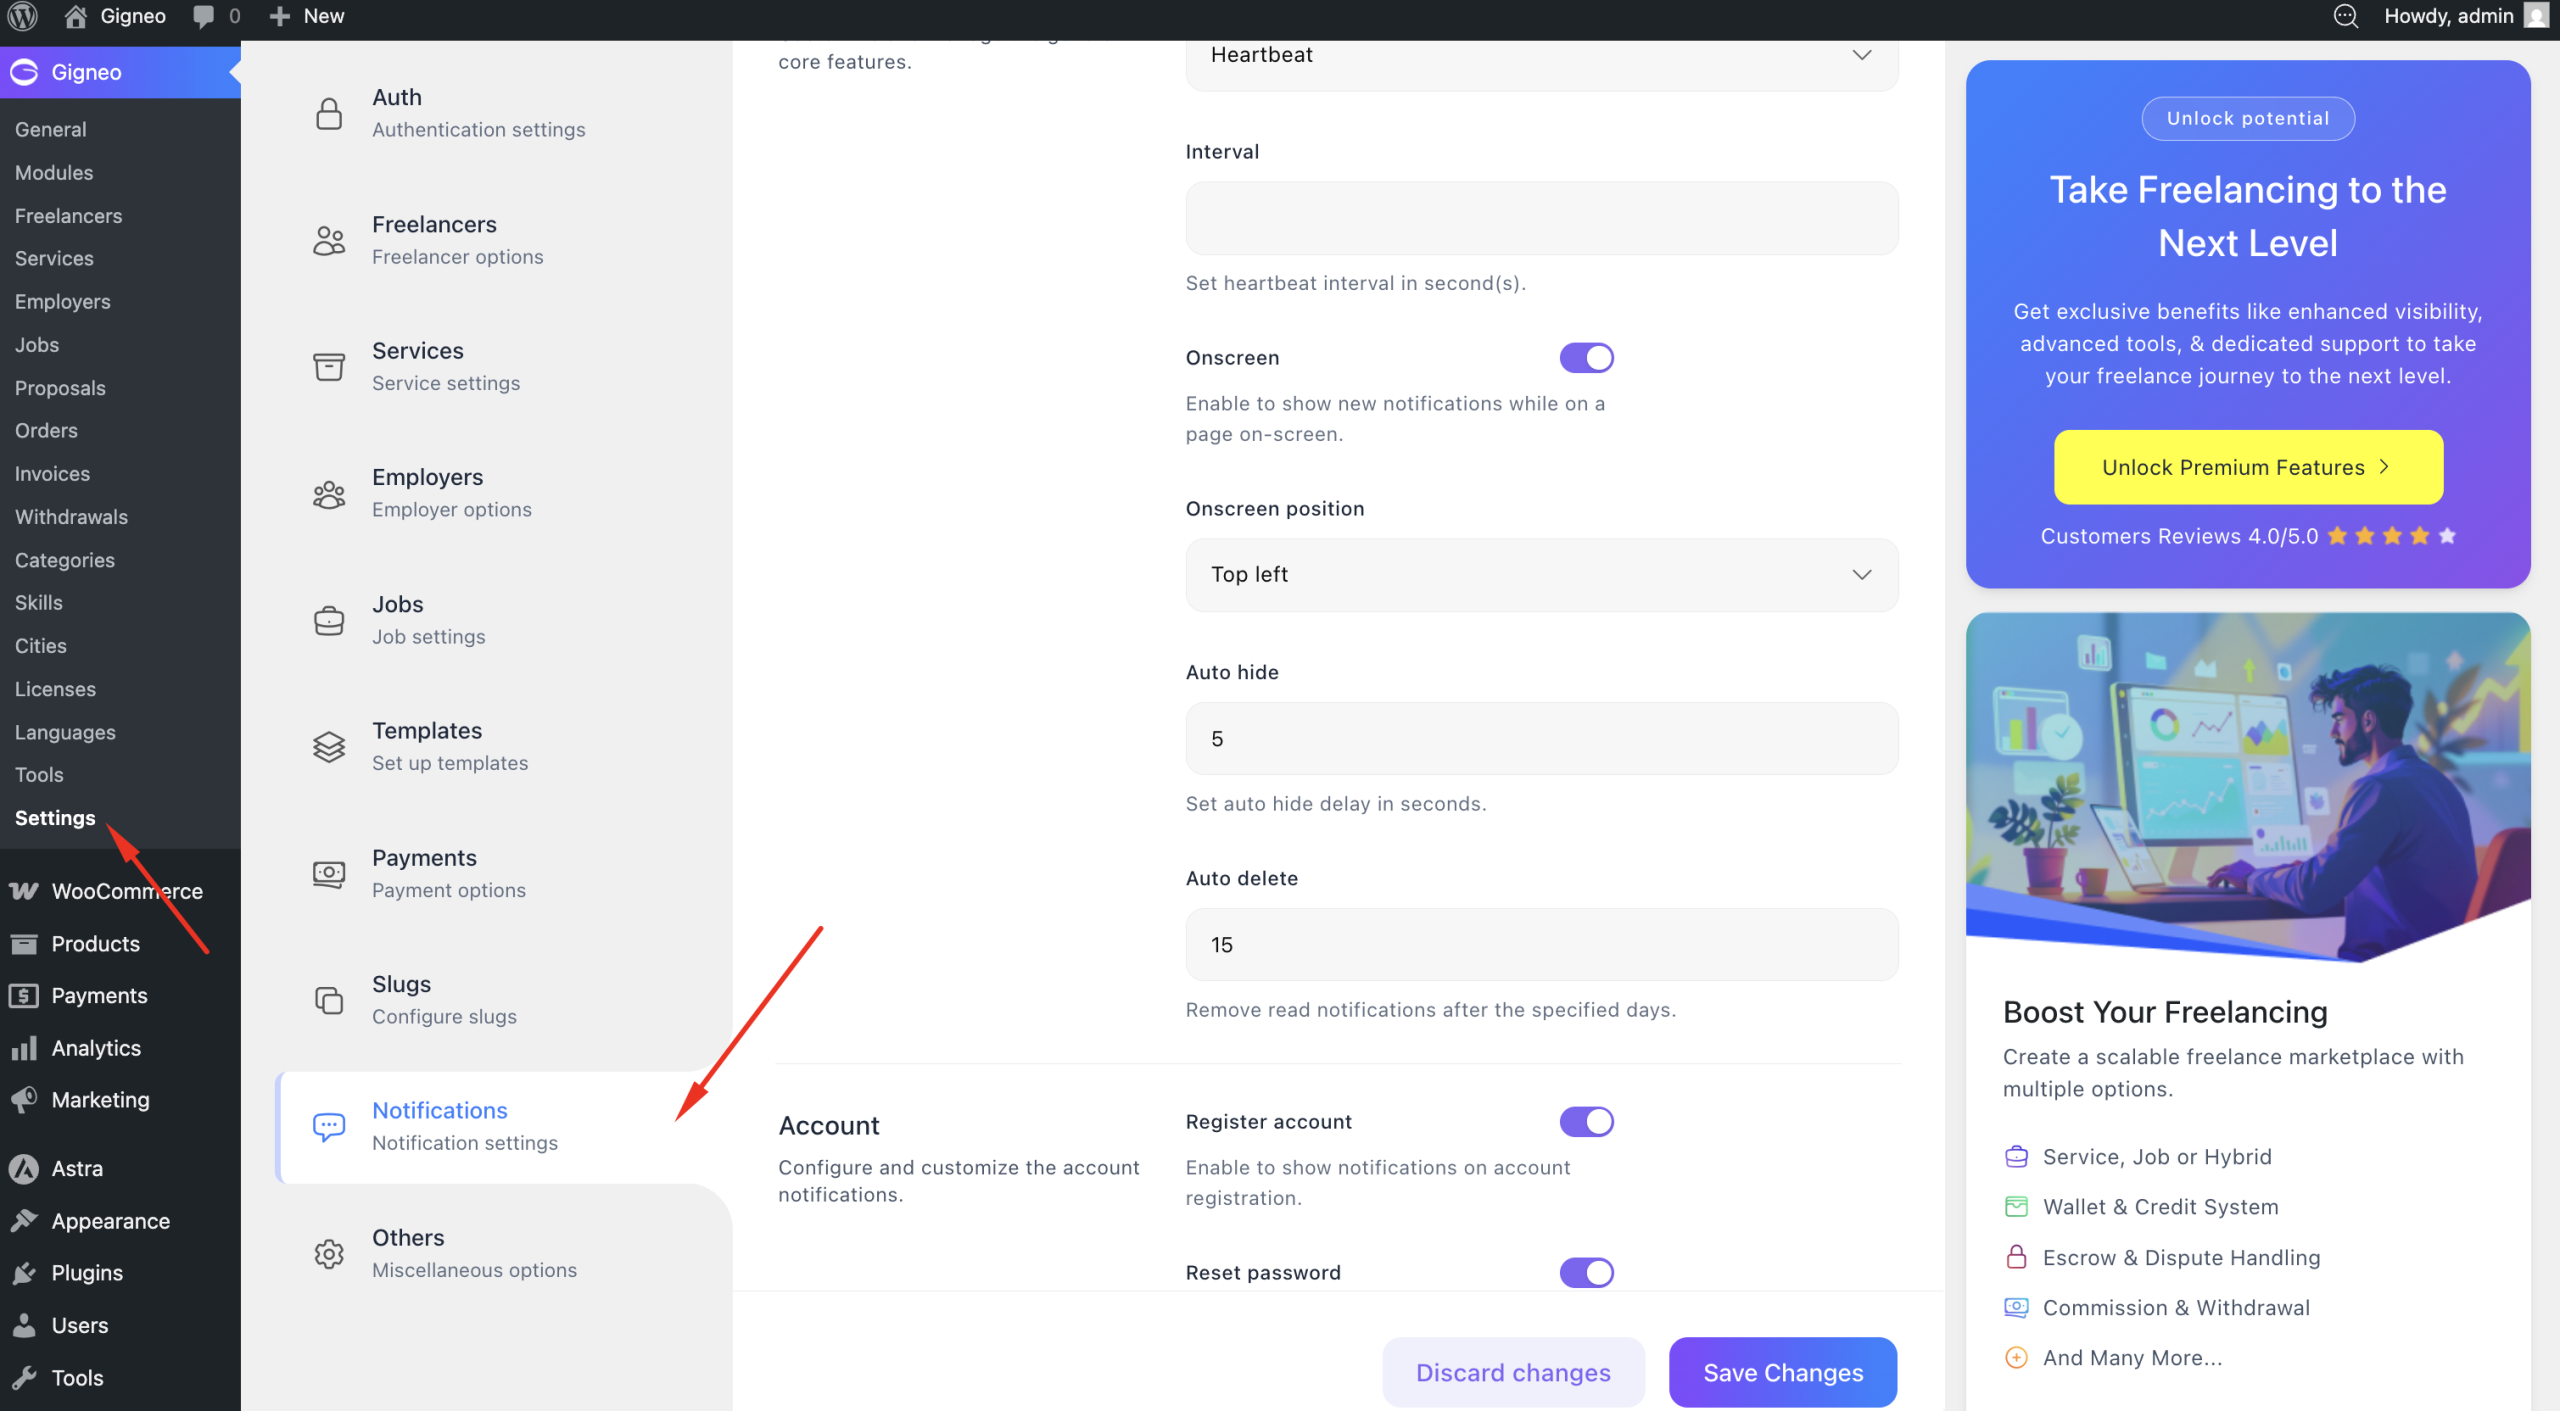
Here you can configure the real-time notification type, allowing you to define how live notifications are handled across the platform.
You can also set the notification interval, which controls how frequently the system checks and delivers new notifications to users.
The onscreen notification settings allow you to customize how notifications appear on your marketplace interface.
This includes configuring the notification position on the screen as well as enabling or disabling auto-hide behavior, which determines whether notifications automatically disappear after being displayed.
You can also configure auto-delete settings, allowing notifications to be automatically removed after a defined number of days. This helps keep the notification system clean and optimized.
In addition, Gigneo allows you to enable or disable specific notification types, giving you full control over which marketplace activities trigger user notifications.
These settings help create a smoother user experience by ensuring notifications are delivered in a way that fits your marketplace workflow and user preferences.
Other Settings
The Other Settings section includes additional configuration options that help fine-tune various marketplace behaviors.
To access these settings, navigate to Gigneo → Settings → Others.
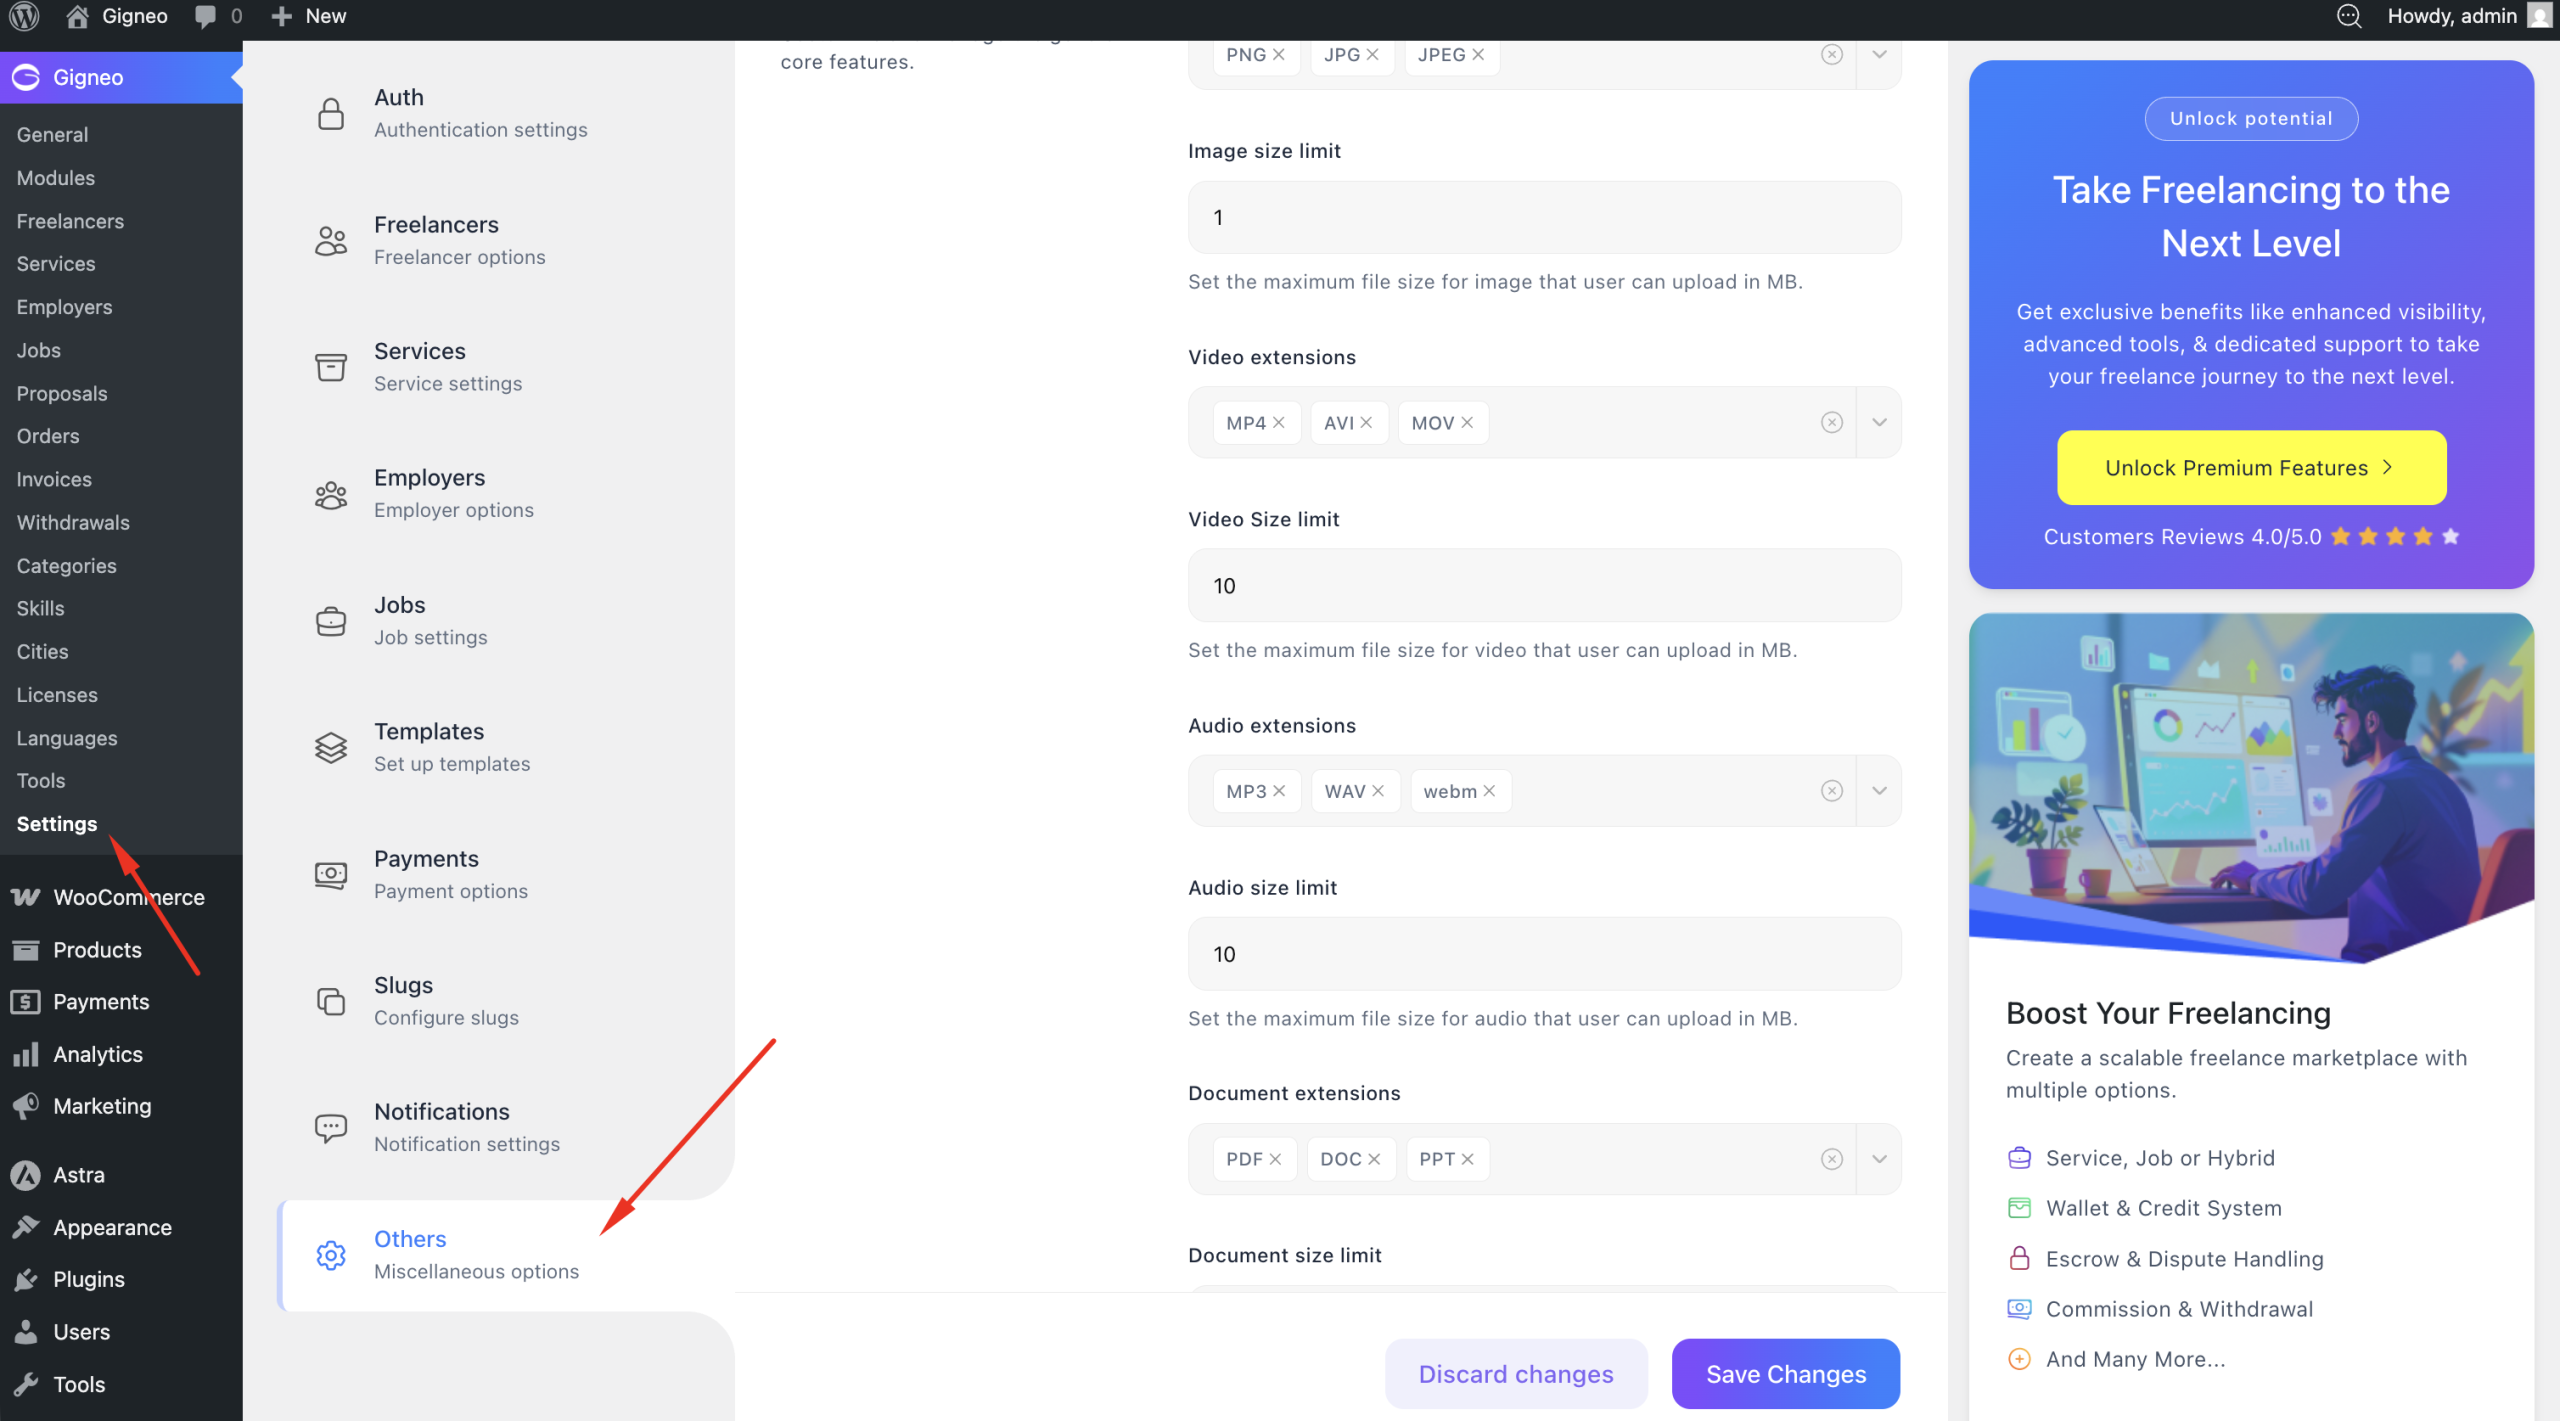
Here you can configure media upload settings, allowing you to define supported file extensions for different upload types including images, videos, audio files, and documents.
You can also set upload size limits, helping control file storage usage and ensuring uploaded media stays within your platform requirements.
The Moderator Settings allow you to customize how marketplace moderators appear across the platform.
This includes configuring the moderator avatar, display name, and label, allowing you to create a more branded and professional moderation experience for users.
In addition, this section includes other miscellaneous configuration options used to manage smaller platform behaviors and additional marketplace preferences.
These settings provide extra flexibility and allow you to further tailor Gigneo according to your marketplace needs.
Final Notes
The Settings tabs in Gigneo give you complete control over how your marketplace operates.
From configuring platform structure and authentication to managing payments, templates, notifications, slugs, and other advanced options, each settings section is designed to help you build a marketplace that matches your exact business requirements.
It is recommended to review all settings carefully during initial setup and update them whenever your marketplace requirements evolve.
Once your settings are fully configured, your platform will be ready for content creation, user onboarding, and marketplace launch.